Hey guys! What’s the autumn in your country/city? The weather here finally became amazing – only +29C! And in my home-city in Russia is -7C! Which weather do you like more?
I had the leftovers of squash in my fridge.. and I needed to come up with something to have for dinner. A very simple way to use it – make savory pancakes, but that idea seemed too boring for me. Further ‘excavations’ brought me a beet, a piece of pecorino cheese and a glass of red wine. And the idea came up! Give it up and just drink wine. 😀
So, the measurements in the recipe are given roughly, don’t be afraid to be an artist and make it to suit your own taste. The dish has a wonderful flavour, and this is a very simple way to cook. I served it over a bed of mashed squash and potatoes, and that was incredibly satisfying! Bright and slightly sweet squash and beet, mildly spicy pink pepper give that contented and warm-inside feeling which is what autumn cooking about.
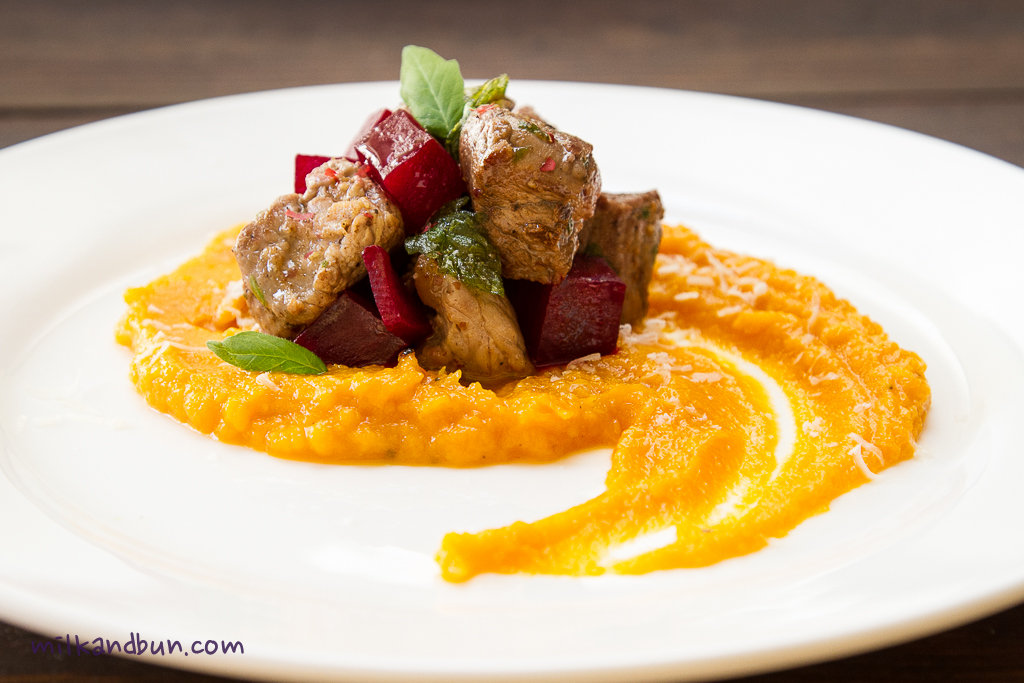
Veal with pink pepper and squash puree
Ingredients
100-150g veal, cut into cubes
5 pink peppercorns, crushed
few sage leaves
1-2 Tbsp dry red wine, optional
80-120g squash or pumpkin, cooked and mashed
1 Tbsp beet, cooked and cut into cubes
1 small potato, cooked and mashed, optional
1-2 Tbsp pecorino cheese, grated
sea salt, to taste
1 Tbsp olive oil
Method
- In a bowl put veal cubes, pink pepper, some salt and chopped sage. Pour in wine and stir well. Cover and let marinate for 10-20 minutes.
- Make vegetable puree for the garnish. Combine mashed squash, potato and cheese together. Season to taste.
- Heat an oil in a frying pan over medium heat. When oil is hot, add meat and fry it. Turn occasionally until done as desired and browned on all sides.
- Mix pan-fried veal with beet cubes.
- Put the squash puree on a serving plate. Arrange veal on top. Sprinkle with sage and pecorino cheese, if desired.
Of course a great glass of red wine goes hand in hand with this delicious veal. 😉
Enjoy the dinner!