Tag Archives: Russian

Kulesh

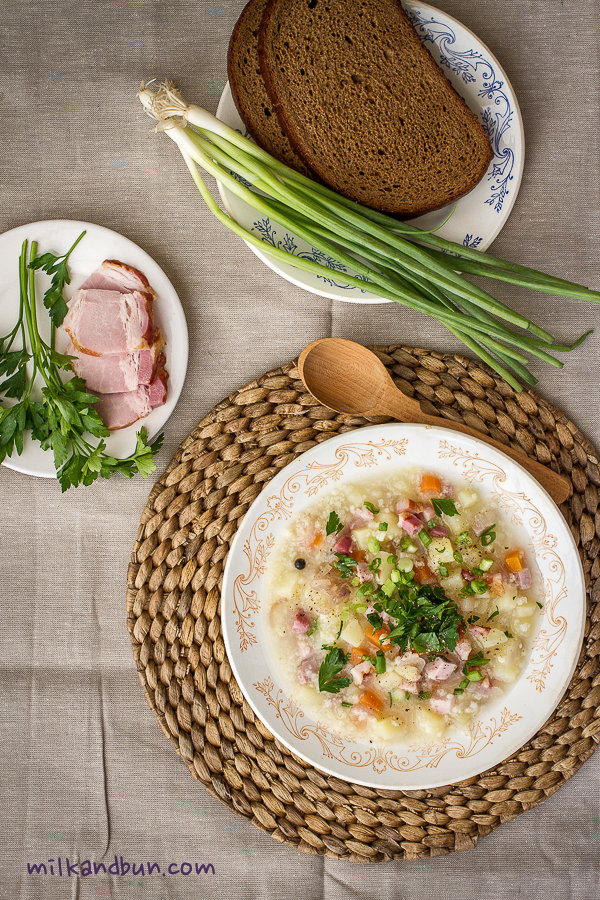
Kulesh – simple thick soup/pottage, that was popular in old times among peasants and Cossacks. It was also called “field pottage or kasha”, as it was often cooked by farmers for their lunch during field works. This pottage consisted mainly of millet and any root vegetables that were available at the moment. Garnished with some onions and salo (salted or cured fat, usually pork one), kulesh was prepared on a fire, that added a nice smoked flavor to the whole dish.
It should be thick enough but if you prefer thinner consistency add more water. Mine was thick and nourishing because of smoked meat (cooked pork belly). Using smoked meat replaces the cooking on an open fire. But feel free to make completely vegetarian version and omit the meat.Kulesh - simple thick soup/pottage
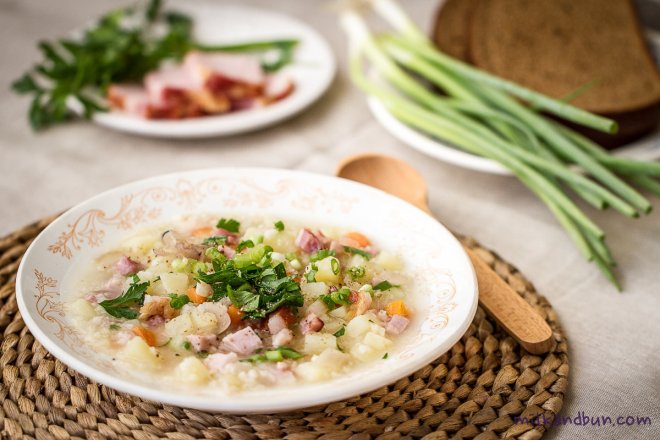
Once I wrote that millet is a healthy grain or seed. And if you still think it’s just for the feeding birds, you’re completely wrong and miss lots of benefits of this lovely grain. It’s a good source of vitamins B, calcium and iron. Here another recipes that I do love and cook at home: sweet breakfast millet porridge and autumn recipe – millet cooked in a pumpkin pot.
So, have you ever cooked millet? What are your favorite recipes?Kulesh

Kulesh

  • Servings: 4
  • Difficulty: very easy
  • Print
You can add some cubes of celery root along with other vegetables.
Ingredients
4 medium potatoes, cubed
1 large carrot, cubed
200g millet
1 tbsp vegetable oil
1 large onion
150g smoked pork belly
1 bay leaf
fresh chopped parsley and spring onion, optional
S&P to taste
Method
  1. Boil 2l water in a large pan. Add cubed vegetables and some salt. Bring to boil, reduce the heat, cover with a lid and simmer about 15 minutes.
  2. Wash millet throughly under running water. You may also cover millet with some warm water, it helps to cook it faster.
  3. Add millet to the pot along with bay leaf and simmer for 10-15 minutes more or until it’s cooked.
  4. Meanwhile, slice or chop onion, and cut pork belly into thin slices or chop it as you like. Heat the oil in a frying pan and saute onion until it’s soft. Add pork belly and fry for few minutes.
  5. Stir the onion-pork mixture into the soup. Adjust the seasoning.
  6. Pour the soup into serving bowl. Sprinkle with fresh herbs, if desired. Serve with bread.

Enjoy!

Sunday Breakfast: Oladushki

 One of the most-viewed and visited posts in my blog is “oladushki”. For those of you who don’t yet know the meaning – it’s Russian name for small pancakes. Yes, it’s absolutely incorrectly to call them blini as many people do (blini are large and thin like crepes, look here), and how they are usually called in restaurants or sold in stores.Oladushki with sour cream

 This is the perfect breakfast or brunch to spoil yourself with on the weekend, and it could be made in a short time. Russian housewives most of the time use soured or any leftover kefir to prepare these soft beauties. You can try to substitute with buttermilk, drinking but thick yogurt, or as I did – used laban (local dairy drink). Oladushki go well with many sauces: honey, sour cream, sweetened yogurt, jam or sweet condensed milk. You can also serve them as a savory breakfast: with cream cheese or sour cream along with cured salmon or caviar.Russian Oladushki with jam&yogurt

 Few tips on how to make oladushki soft and fluffy (not only to add a baking soda for leaving):
you should sift the flour (add the air); do not over-mix the batter (it leads to tough texture);
let the batter rest for a half an hour and then do not stir it again (otherwise the bubbles will deflate);
carefully scoop the batter from the side of the bowl – do not dip the spoon into the center;
finally, when you flip oladushki over – do not press it with a spatula.
 So, this or next weekend morning that you make these oladushki, make a few extra. Cover tightly with plastic wrap and keep in the fridge. And next hectic morning you don’t need to skip breakfast: reheat them, sit down&enjoy and plan for a successful day. 🙂
Soft&fluffy Russian oladushki

Sunday Breakfast: Russian Oladushki

  • Servings: 2-3
  • Difficulty: easy
  • Print
I served oladushki with plum preserve and vanilla yogurt.
All ingredients should be at room temperature, so take them out of the fridge 1 hour ahead.
Ingredients
1 medium egg
a pinch of fine salt
1-2 tsp white sugar
250ml kefir (laban or buttermilk), warm
170g plain flour
1/3 tsp baking soda
sunflower or any other veg.oil for frying
Method
  • In a large mixing bowl, beat an egg with salt and sugar until fluffy. Mix in kefir.
  • Sift the flour with soda into the batter. Whisk gently until the ingredients are just incorporated. Do not overmix –  it leads to tough texture.
  • Let the batter rest for a half an hour and then do not stir it again (otherwise the bubbles will deflate).
  • Preheat the frying pan (until a drop of water skitters across the pan), lightly coat with oil.
  • Carefully scoop the batter from the side of the bowl. When oladushki are dry around the edges and bubbles over the top – turn it over. Don’t press oladushki with a spatula!
  • Transfer to a large plate in a single layer, keep it uncovered (you may keep them in a warm oven), while preparing the rest.
  • The best eaten fresh with your favorite sauces. But they also can be covered with a plastic wrap and kept in the fridge until the next morning.
Enjoy!

Beef Stroganoff with pickled cucumbers

 Beef Stroganoff is a definitely a classic dish, which can be make rustic and simple at home and more elegant in a restaurant. I do hope you have already cooked this dish by following the classic recipe, that I posted, and liked it. 😀 This time I deviated from the traditional recipe: firstly, I thinly sliced the meat (originally it’s cubed); secondly, used the thick cream along with sour cream; and finally, the main twist is the addition of small pickled cucumbers. Salty and crunchy, thinly sliced cucumbers give an amazing and unbelievably tasty note to the whole dish! I bet you will love it even more!Russian Beef Stroganoff with pickled cucumbers

Beef stroganoff is a staple and cooked very often in my house, so I just whip it up without a recipe in little time. The outcome is always the same – a satisfying meal with authentic taste! Of your course you need to follow few simple rules and you can be able to make the best Stroganoff like Russian cooks! You may use large pickled cucumbers, small gherkins or cornichons; crunchy dill and garlic are the best, soft or sweet are the worst. The best accompaniment is mushed potatoes or buckwheat. I hear you rice-lovers: use plain fluffy rice, but please do not use pasta or other noodles, it destroys the dish!

Beef Stroganoff with pickled cucumbers

  • Servings: 4
  • Difficulty: easy
  • Print
You may sprinkle beef with a teaspoon of powdered paprika, if desired (add it along with flour).
Ingredients
Mashed potatoes
1 tsp fine salt (for water)
5-6 medium  potatoes, peeled, cut unto chunks
1 bay leaf
50g butter
50ml warm full-fat milk (or a bit more, if needed)
sea salt, white&black pepper to taste
Beef Stroganoff
500g beef fillet (sirloin is good),  thinly sliced
some flour, to coat meat
2 tbsp oil (olive or sunflower are good)
15g butter
1 large brown onion, thinly sliced
100g mushrooms, sliced
1 tsp dried thyme or 2-3 tsp fresh
6-7 small gerkins or 2-2 large pickled cucumbers, sliced
sauce
sea salt, white&black pepper to taste
Sauce
150g sour cream
100ml 30% cream
2-3 tsp Englsih mustard
100ml warm water, if needed
some chopped parsley, for garnish
 
Method
For mashed potatoes, in a large pan, bring slightly salted water to boil. Add potatoes and bay leaf, bring to boil again, reduce the heat to medium and simmer for 15-20 minutes or until potatoes are soft and ready. Drain potatoes. Stir in butter, milk and season to taste. Mash it. Add a bit more milk, if the mixture is too thick.
  1. Lightly flour the beef from all sides, shake off any flour excess. Heat the heavy frying pan, when it’s hot, add oil and meat. Sear the beef from all sides. Divide into few batches if needed, so you don’t overcrowd the pan and steam the meat. Cook for 2-3 muntes or just until browned. Transfer to the plate.
  2. In the same frying pan, add butter along with onions, mushrooms and thyme. Fry on a high-medium heat for 5-7 minutes or until mushrooms are lightly golden. Then add fried meat and saute on a medium heat for 5 minutes more.
  3. Meanwhile, prepare the sauce: in a small bowl, combine the sour cream and cream with mustard.
  4. Add cucumbers and sauce. Give a good stir, season with salt and pepper. Cook on a medium heat for 10 minutes longer. If the creamy gravy is too thick, add hot water and stir.
  5. Serve with mashed potatoes, sprinkle with parsley. Enjoy!
Beef Stroganoff with pickled cucumbers

Russian pirogki

 Small, large, festive, with cabbage and eggs, potatoes, with wild mushrooms or rice&fish, with jam.. It’s all about pirogi (pies in Russian) and pirogki (small pies). Pies have been always prepared and enjoyed in Russia. The word “pirog” came from a word “pir” that means feast and therefore in old Russia every festival and banquet could be hardly imagine without a large, beautiful and delicious pie.
 In old times pies were generally made with rye, wholegrain or any similar flour (which is considered very healthy nowadays), such flour were available among poor people and thus pies could be eaten very often. While the white wheat flour was an expensive thing and using it was an luxury, affordable only among novelty, bourgeoisie and other high classes.
 The dough could be prepared with yeast or simple unleavened, based on a soured milk or cream, also made with oil or butter (shortbread pastry). Pies fillings were diverse as well, it could be meat of wild birds like pheasant and black grouse, vegetarian – with fresh forest mushrooms during summer and autumn, with soured cabbage, eggs or dried mushrooms on a winter time, sweet – with wild berries, dried fruits or homemade preserve.
 Without a doubt, serving a large pie or even several pies on a festive table was an indication of the host’s wealth and prosperity.
Russian pirogki
 The dough for these pies was made with yeast and soured liquid yogurt (I used local soured drink-laban, which is very similar to Russian kefir). The dough is very tender and fluffy, and of course very easy to prepare. Pies made from this dough stay soft even on the next day!
 I’m loving mashed potatoes filling since childhood, I haven’t made it pretty long time.. Second favourite filling is a mixture of chopped hard-boiled eggs&spring onions, that reminds me spring! I posted the recipe that you can find here, moreover the dough I made that time is unleavened (no any yeast) and even more quickly to prepare, but not thick and fluffy as this one. The choice is up to you, I love both. 🙂
Russian pirogki with potato filling

Russian pirogki with potato filling /sour milk&yeast dough/

  • Difficulty: moderate
  • Print
Instead of kefir you can use laban, buttermilk or any soured milk.
Ingredients
Dough
180g plain flour
6g instant yeast
250ml kefir, warm/at room temperature
50ml sunflower oil
a good pinch of fine salt (about 1/2 tsp)
1 tsp white sugar
1 egg yolk mixed with 1 tbsp milk, for glazing
Potato filling
400g potatoes, peeled and cut into chunks
1 bay leave
1 tbsp oil (olive or sunflower)
a small knob of butter
1 medium onion, chopped
1/2 tsp dried thyme (or 1 tsp fresh thyme leaves)
15g butter
a pinch of freshly grated nutmeg, optional
salt, black paper to taste
some finely chopped parsley (2-3 tbsp)
Method
 
Dough
  • Sift the flour into a large mixing bowl, combine with yeast.
  • In a cup/bowl stir kefir with oil, salt and sugar.
  • Pour kefir mixture into flour. Mix to combine a dough. Cover with kitchen towel or plastic wrap and leave to prove for 45-60 minutes.
  • While the dough is proving, prepare the potato filling (recipe below).
  • When it’s risen, divide the dough into several equal balls. The size depends on your taste: if you wish to make small pirogki – you need small dough balls. Roll each ball slightly into round shape. The dough is soft and tender, that sometimes I don’t use rolling-pin and carefully stretch the dough with hands.
  • Put a tablespoon or two of potato filing into each round, close and arrange onto lined with baking paper baking tray.
  • Leave to rise for 10-15 minutes. Brush with egg wash.
  • Bake in a preheated 180C oven for 20 minutes.
  • Optionally, you can brush pirogki with butter. Cover with kitchen towel: it helps the dough to stay softer.
  • Serve warm with milk or tea.
Potato filling
  • In a large pan, bring water to boil. Add potatoes and bay leave, bring to boil again, reduce the heat and simmer on a medium heat for 15-20 minutes or until potatoes are soft and ready.
  • Meanwhile, in a small frying pan, heat oil and butter, fry onions on a medium heat until soft and lightly brown. Stir in thyme and saute for a minute more.
  • Drain potatoes (leave 2 tbsp of water in a pan). Add butter, nutmeg and season to taste. Mash it. Stir in fried onion and fresh parsley.
Enjoy Russian pies!

Millet bitochki

 Bitochki or bitki is the name for round-shaped, flattened cutlets (côtelettes/patties) in Russian cuisine, which are prepared from chopped meat or grains. Originally in old Russia, a good and expensive cuts of meat were flattened, cooked and called bitochki, but lately people adapted the recipe and began to use cheap meat. Any remaining meat was chopped, mixed with other ingredients and then served fried or baked. Poor people even used grains.MIlletBitochki
 Nowadays, not only poor one can make such bitochki. I used millet for mine. Bitochki are not only tasty, but healthy and it is a good option for a meatless day. Millet is one of the healthiest grain, moreover is considered to be one of the digestible and non-allergenic grains*. It contains lots of fiber and low simple sugar. Finally, bitochki have such a nice texture inside (it reminds a white fish a bit) and crispy outside.
 You can serve them with a lettuce-tomato salad on a side. I made mushrooms sauce, but if you are run out of time or lazy – serve with a good dollop of sour cream (or creme fraiche).
MIlletBitochki with mushroom sauce

Millet bitochki with mushroom sauce

  • Servings: 12 pieces
  • Difficulty: moderate
  • Print
Instead of mushroom sauce you can serve bitochiki with sour cream.
Bitochki as well as mushroom sauce can be made a day or two ahead and then gently reheated.
 
*You can use both cream and sour cream, or any one.
Ingredients
150g millet
500ml hot water
1 medium egg
2-3 tbsp finely chopped parsley
1 medium onion (any sort you like)
300g mushrooms (I used oyester and champinions), chopped
1 tbsp butter+ 1 tbsp olive oil, for mushrooms
20g butter
15-20g plain flour
100ml 35% cream*
2-3 tbsp sour cream*
150ml hot water
salt, freshly ground pepper to taste
2 Tbsp olive or sunflower oil, for frying
some chopped parsely, for garnish, optional
Preparation method
  • Wash millet throughly under running water, cover with hot water, season with some salt, bring to boil, then reduce heat to medium-low and simmer for 20-30 minutes or until millet is ready. You need to cool it completely. To make it faster, spread millet on a large plate and put in a fridge for 10-15 minutes, while preparing the mushrooms and sauce.
  • In a frying pan, heat butter and oil, add onion and fry for 5 minutes (set aside half of onions for millet ). Add mushrooms and fry on a hight heat for 10 minutes or until all liquid is evaporated (if there is any). Season to taste. Set aside 3-4 tbsp mushrooms for millet; then chop it finely.
  • Meanwhile, in a small pan, add butter and flour, stir on a medium heat for 5 minutes. Stir into mushrooms.
  • Pour over cream along with sour cream, give it a good stir. Pour in hot water. Check the seasoning. Simmer on a medium heat for 5-8 minutes. Add more hot water to reach desired consistency. Keep the sauce warm.
  • Transfer cooled millet in a mixing bowl, add egg, parsley, season with salt and pepper. Mix in fried onion and mushrooms. Combine the mixture. I didn’t use any flour, but if the mixture seems doesn’t want to resemble into a patty, add a tablespoon or two of plain flour.
  • Generously spread breadcrumbs on a large plate. With a tablespoon take a millet mixture and make a ball, pat it down with your hand or spoon. Cover in a breadcrumbs. Repeat with all millet mixture.
  • In a large frying pan, heat oil, put bitochki and fry on both sides until golden. To keep it warm while preparing others – put them in a preheated 120-150C oven.
  • Serve with mushroom sauce and sprinkle with extra parsley, if desired.
Enjoy!

1 2 17