Tag Archives: Russian

Jam Cake

 This cake is well-known in my home-country, and it’s quite popular among village people, or at least who prepare homemade jams. Oh, we love make jams in Russia! Nothing can beat a real homemade jam, jam for which you picked up fruits or berries yourself in the garden or forest during summer. And like everything is done at home the taste of every jam in every home is unique. When it is dark and dank outside, or even when it’s a snowstorm during cold Russian winters, it’s such a great pleasure to be at warm and cozy home, sip a hot herbal tea with a spoon of jam, or spread it thickly over a piece of bread.
 Many Russian grandmothers used to make this cake, mainly when was a cup of jam left, and nobody wanted to eat it up. Among such ladies was grandmother of my classmate, she used to make delicious cake with strawberry jam! 
 The cake recipe is very easy and quickly to prepare, you need only few ingredients and patience while it cooks, and the result is sweet and tasty cake! Ability to use any jam is excellent, every time you’re getting new-flavoured cake! Isn’t it cool? 

Jam Cake

Jam Cake

Ingredients
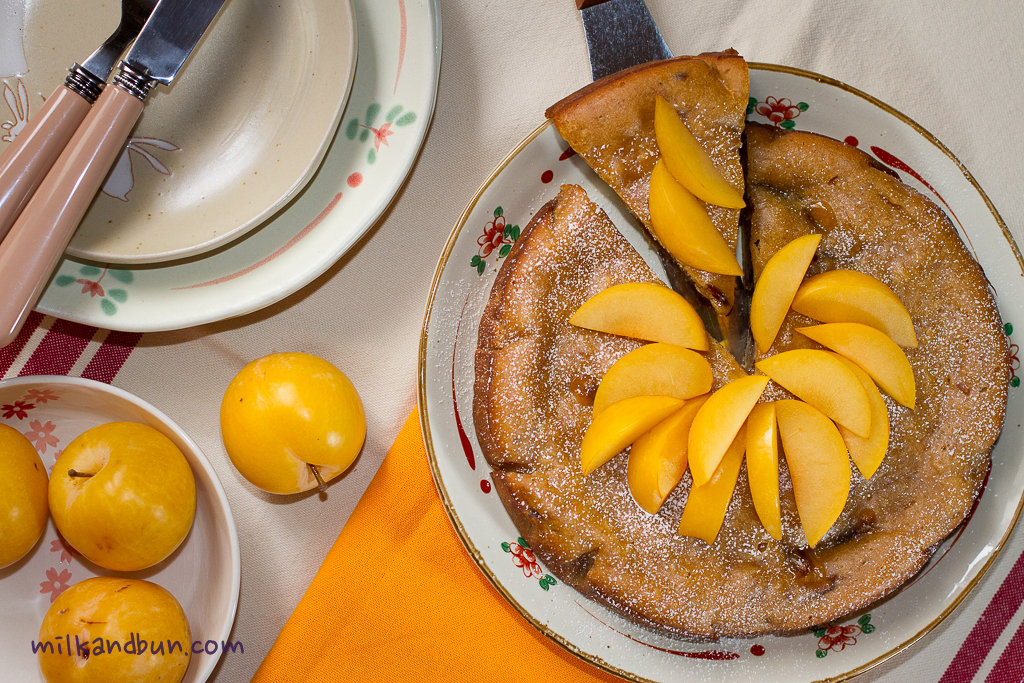
200ml jam, not watery (I used plum jam)
200ml full fat kefir
1 tsp baking soda
50-100g white sugar, depends how sweet is jam
1 big egg or 2 small
300-350g all-purpose flour
In a big bowl, mix jam and soda, leave it for 5 minutes. In another bowl, slightly beat eggs with sugar. 
Add kefir and beaten eggs into jam mixture, stir well. Add flour, and combine all ingredients.
The consistency of the batter should be little bit thicker than for pancakes.
Pour batter into greased pan, bake in preheated 180C/360F oven for 50-60 minutes.
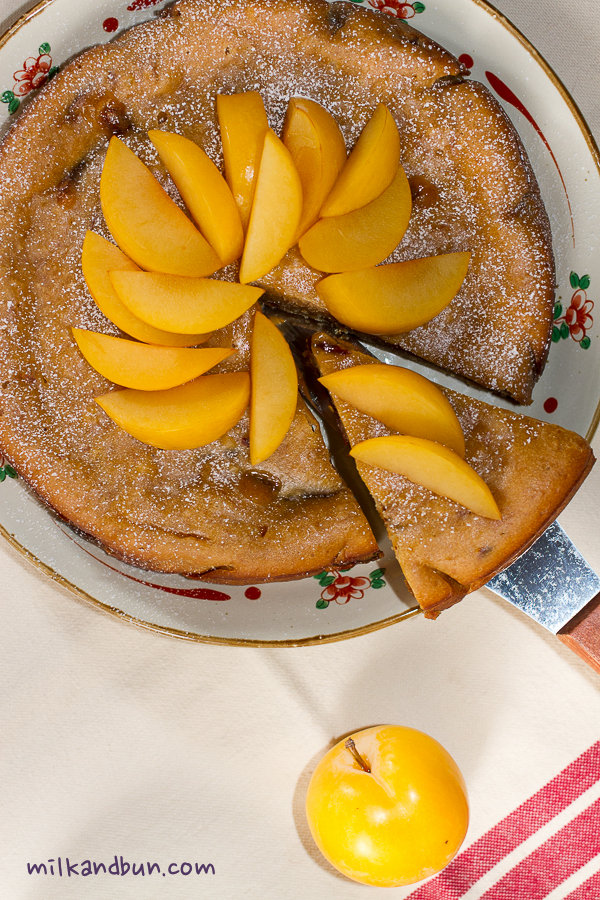
Sprinkle with icing sugar and decorate with fruits or berries, if desired.
Enjoy!

Jam Cake with plums

Cherry Strudel with nuts

  First time I have tried strudel at home. It was a frosty winter day, I was at home finishing a homework after school, when my mother came and told me she’d got a new dessert recipe! I was so excited, because it has been a habit in our family, almost every evening we had a tea with some freshly-baked pies, buns or danishes whether it were homemade or store-bought.. Easy to guess, it was a strudel recipe. At that time of the year we could make only apple-raisin filling; compare to today it was impossible to buy even frozen cherries, only if you hadn’t froze it by yourself last summer. So, we had some nice apples, which were picked from garden and kept in a cellar, raisins and walnuts; the recipe worked so good, the pastry turned thin and smooth.. and we liked the result – new, mysterious and so delicious strudel! 🙂 Believe me or not, since then I’m using exactly the same pastry recipe and it works! 🙂

 Certainly, you can cheat and use filo pastry, though you should try to make the pastry from scratch at least once, it only sounds complicated. Most of you know, that nothing could beat the homemade pastry! 😉
Cherry Strudel
 Do you know, that first strudel recipe is dating back to 1696; strudel legend says that the Austrian Emperor’s chef  was perfectionist, he even made an order that strudel pastry should be so thin that you could read a love letter through it!
Scrumptious Strudel

Cherry Strudel with nuts

Ingredients
Pastry:
250g all-purpose white flour
1 egg
50g melted butter
125ml warm water
a pinch of salt
Filling:
700-900g pitted cherries
3-5 Tbsp caster sugar
4 Tbsp finely crushed almonds or breadcrumbs
3 Tbsp walnuts, coarsely chopped
3 Tbsp hazelnuts, coarsely chopped
40g currants (black)
40g golden raisins
3 Tbsp cognac/brandy/rum
 
40g melted butter, for glazing
1-2 Tbsp icing sugar, for serving
 
Preparation
  1. The pastry. Sift flour on to a clean surface, add salt, and make a  well in the middle. Slightly beat an egg with water and butter, add the mixture into flour. Knead the dough for 10 minutes, time to time punch it down and throw until it becomes elastic and smooth. Wrap it in clingfilm and leave it at room temperature for 30 minutes.
  2. Preheat the oven 200C/400F. Line the baking tray with baking paper, grease it with some melted butter or oil.
  3. The filling. In a cup or small bowl, put all washed raisins and cover with cognac; soak for 15 minutes, then pour out remaining cognac. Cut cherries into halves, you may keep some whole.
  4. The pastry. Dust a workspace with flour and roll out the pastry into rectangle as thinly as possible. You can place wet and floured tea-towel, and do it on it. When you can’t roll the pastry any more, begin stretching it using your hands – place back side of your hands under the pastry and stretch it. Keep on going until it is very thin or you can see pattern of the tea-towle through it.
  5. Brush the rolled dough with melted butter. Sprinkle with crushed almonds, leave en edge 3cm uncovered. If using breadcrumbs, brown them in some butter until golden-brown.
  6. Spread cherries, and sprinkle with sugar. Adjust amount of sugar, depending on your taste.
  7. Scatter raisins and remaining nuts on top.
  8. Fold uncovered edges in, then roll up the pastry into a sausage shape. 
  9. Gently put the strudel on the baking tray, brush with melted butter. Bake for 35-45 minutes until the pastry is golden.
  10. Allow to cool slightly before serving, dust with icing sugar. Serve while it’s still warm with vanilla ice cream or sauce.
 For the vanilla sauce, in a medium pan warm 125ml milk and vanilla bean (don’t allow to boil); add 1 beaten egg yolk along with 1Tbsp caster sugar and 1 tsp cornmeal into pan; stirring constantly, cook on a medium heat for 9-12 minutes, until the sauce thickens a bit. Let it slightly cool and serve with strudel.
Absolutely tasty!
Let’s party, lovely bloggers! Let’s drink (ha, only lemonade so far..) and eat all those tasty dishes, that we’ve brought at FF! 🙂

Summer is a time for Russian Okroshka

Okroshka is a cold Russian soup topped with kvas (a fermented beverage made from bread), which combines chopped vegetables and cooked meat or fish. The name originates from verb ‘kroshit’ (soft t), that means to crumble.                                The history of the dish varies. One says it came from the old simple dish – mix of sliced radish and chopped onion topped with salt and kvas, lately some boiled potatoes were added. Another says, it came from burlaki, who ate salted fish with kvas.. Anyhow, okroshka had been made from remains of roasted pork, beef, turkey, and grouse; the meat was chopped along with pickled or fresh cucumbers, onions, sometimes with splash of brine (from pickled cucumbers or cabbage) or vinegar, and of course, homemade kvas. Peasants who work in fields took vegetarian okroshka and kvas for their lunch; kvas is well-known drink to quench a thirst, and okroshka is wonderful and refreshing dish during hot summer months.

Okroshka!
 You can vary vegetables in okroshka to suit your own taste, add more or less some of them, you can add some boiled carrots, rutabaga (swede), turnip, pickled cucumbers, onion, or tarragon. It’s commonly accepted that meat or fish should be 1:1 to veggies.
 For the spice dressing, in a cup mix some kvas with black pepper and a teaspoon of mustard or horseradish; or rub some chopped spring onion, parsley and/or dill with salt. This dressing is added to a bowl with okroshka, then you should stir okroshka with a spoon and keep for 20-30 minuted to allow all flavours to meld; only after that you can pour over kvas, and add sour cream.
Okroshka-7
    The authentic okroshka should be topped with kvas, but nowadays in Russia you can find okroshka with kefir, pure or diluted with mineral water, or airan. Such soup can be called ‘cold soup‘, not okroshka. While the original recipe did not significantly change over time, the Okroshka may slightly vary across Russia and the recipe has been slightly modified during Soviet time, some ingredients (like particular fish and meat) were not available or hard to find in a regular grocery, and people buy and use regular pork mortadella, because it contained about 90% of meat those days, and it was a good alternative to meat. Using mortadella was also making the Okroshka easier and faster to cook, and it could be make in a short time as regular salad. Many people in Russia since Soviet era still considering Okroshka with mortadella as original, despite all ingredients for the traditional recipe are widely available.
 So, the choice is up to you! 😉

Russian Okroshka

Ingredients
500-600g boiled beef (or 300g beef+300g chicken), medium cubes
4 medium potatoes
5-6 large cucumbers
6-7 radishes, sliced
4 hard-boiled eggs, chopped or cut into quarters
a bunch spring onion, chopped
a bunch parsley and/or dill, chopped
1 Tbsp sour cream and 1 tsp mustard, per serving
cold kvas (kefir or laban up), 250-300 ml per serving
salt and black pepper to taste
Rye bread, for serving
Method
 Wash and rub potatoes. Place unpeeled whole potatoes a big pan with cold water, bring to boil and cook for 30 minutes or until soft. Let it cool, peel and cut into medium cubes.
 Cut cucumbers into medium cubes. If you want to keep the mixture in a fridge for 1-2 days, I suggest to discard the seeds.
 In a large bowl combine meat, vegetables, onion and greens, gently stir. You can add eggs on this step, or later into each plate.
 Put some okroshka into a serving plate, add mustard, sour cream, season to taste and give it a good stir. Pour over kvas or kefir. Enjoy!
Refreshing Okroshka
 Do you like matryoshki – those lovely wooden dolls? 😀

Draniki

 Draniki – thin and round potato pancakes, are often pan-fried and served with sour cream. The word ‘draniki’ originates from the verb ‘drat’ (soft t), which means grate, rub. It was originally a common breakfast, and today we stick with this tradition, but in some restaurants it’s served all day long. Draniki are so beloved and popular in our country, that not even every Russian knows, that it is Belarus dish.
 Potato was brought to Russia in the end of 17th century, when it was served as an exotic dish only at royal banquets, and potatoes were sprinkle with sugar, not salt and pepper as nowadays. At that time in Belarus, potato had been known for 80 years. Today potato became the main vegetable in Belarus, and now over 200 potato dishes are known.
  Similar potato pancakes can be found in many countries, like hash browns in the USA, kartoffelpuffer in Germany, Swiss rösti, or Jewish latkes, and etc.
Draniki
 This is a simple recipe that is easy to prepare and produces great results! 🙂 Enjoy!

Draniki - Russian potato pancakes

  • Servings: 2-3
  • Difficulty: easy
  • Print
Ingredients
4 large potatoes
1 egg
2 Tbsp all-purpose flour
2-3 Tbsp fresh dill, finely chopped (or 1 1/2 tsp dried)
a good pinch of salt
a good pinch of pepper
2-3 Tbsp sunflower oil, for frying
sour cream, for serving
Preparation
  • Peel potatoes and grate (using medium or large holes of a box grater), transferring to a bowl of water. Soak potatoes for 10-15 minutes, then drain well in a colander, and squeeze grated potatoes with hand, extracting as much liquid as possible.
  • Transfer potatoes back to a bowl and stir in egg, salt, pepper and dill. Add flour and mix until well-coated. The mixture should be wet and thick (not soupy!).
  • In a heavy-based or iron skillet heat the oil until hot, but not smoking.  Place the large spoonfuls of the mixture into pan, pressing down and spreading into cm/inch rounds with a fork or spoon. Reduce heat to moderate. Brown draniki on one side about 5 minutes, turn over and brown on the other. Let drain on a paper towels.
  • Serve warm with sour cream or raw.
  • Draniki are also good with creme fraiche, herb cream cheese and ricotta.
The remaining draniki can be kept in a refrigerator up to one day. Reheat in a 160C/320F oven, about 10 minutes.
Russian Draniki

Syrniki

 Syrniki are fried pancakes, which are made from cottage cheese and traditionally garnished with a sour cream. They are very popular and widely-cooked not only in Russia, also in Ukraine, Belarus and Poland. The word ‘syrniki’ is derived from Russian word ‘syr’ which means cheese.
 The main ingredients are cottage cheese, flour, eggs, sugar, sometimes raisins and vanilla. Commonly syrniki are eaten for freakfast, but could be served as a dessert.
 You can find a great variety of syrniki recipes, in one you should add one egg, in another three, in third just few spoons of flour or semolina flour, and etc. Finally, it doesn’t matter which recipe you’re using, just adjust it to suit your own taste.
TIPS:
Flour and sugar. One adds only few tablespoons of flour, in such option, might be difficult to shape syrniki and turn them over during frying, as they will be soft, but at the same time tender and creamy. Amount of sugar is totally depends on your preferences.
Filling. Raisins and vanilla are most popular ingredients for the syrniki filling, but you can go further – add cinnamon, dried apricots, plums or cherries, lemon or orange zest.
Dressing. Sour cream, jam and sweet condensed milk are the most favourite toppings for syrniki. If you neither like the one nor the other, make berry or chocolate sauce, or just dust it with icing sugar, or pour over some honey, add dulce de leche…
Syrniki-2
You can fry syrniki on a moderate heat in a frying pan for 5 minutes on each site or until golden-brown (using few tablespoons of sunflower oil). I propose you the recipe of an oven-baked syrniki, which is much better and healthier, as you don’t need to use oil.

Russian Syrniki

  • Servings: 3-4
  • Difficulty: easy
  • Print
Ingredients:
Cottage cheese, 500g
Eggs, 2
Sugar, 2-4 Tbsp
Flour, 50-80g
a pinch of salt
Semolina, 2 Tbsp
Vanilla sugar or extract, 1 tsp, optional
Raisins/sultanas, 50g
Preparation:
  1. In a small bowl or mug, put raisins, cover with warm water and let it soak, meanwhile you do all below steps. Optionally, you can add a tablespoon of cognac, brandy or rum along with water for an extra flavor. Then pour the water out and wipe raisins.
  2. In a large bowl, combine eggs, sugar and vanilla together and beat well until pale color (use hand whisk or electric mixer).
  3. Add flour, semolina, salt, raisins, and combine well.
  4. Shape beautiful syrniki -about 5cm/2inch in diameter and 1cm/0.5inch wide.
  5. Arrange syrniki on a greased baking tray and bake in preheated 200C/400F oven for 20-25 minutes or until nice golden color.
  6. Serve warm with a dollop of sour cream.
  7. You can keep all remaining syrniki in a fridge, and reheat them next morning.

Syrniki are so delicious that I could eat them every other morning. Cooking of syrniki is highly recommended as alternative to regular pancakes! 🙂

Enjoy! ❤

Syrniki-1

Syrniki-4

1 10 11 12 17