Tag Archives: Russian recipe

Russian Winter Salad (Olivier salad)

 This salad is a traditional dish in Russian cuisine, and most of the time it is associated with New Year celebration, when it’s always served on a festive table along with another popular salad – “shuba”.

 The very first and original version of this salad was invented in the beginning of 1860s by chef Lucien Olivier, who was the owner of the renowned Moscow restaurant “Hermitage”. “Olivier Salad” quickly became popular among restaurant visitors, the salad brought him a great fame and became the signature dish. The recipe and especially the dressing was kept in a big secret, and unfortunately the fact is that the exact recipe is still unknown. But according to some notes, it’s known that the salad contained hazel grouse, veal tongue, black caviar, fresh salad leaves, crayfishes or lobster, some pickled, fresh cucumbers, capers and boiled eggs. And the secret dressing was prepared from fresh raw eggs, some secret herbs and olive oil. 
 As you can see, all ingredients were posh and expensive. So, lately during Soviet time, these fine ingredients were replaced by cheap and widely-available, like boiled kolbasa (bologna sausage) or meat, boiled potatoes and carrots, pickled cucumbers and peas, dressed with store-bought mayonnaise instead of home-made French dressing. Such simple and nourishing salad was widely-popular, and soon it became a staple and traditional dish of Soviet holiday dinner, and particularly of New Year’s Eve. Lately, it’s even got a second name – “Winter Salad”. Beyond Russia this salad is often called as “Russian Salad”.Russian Winter salad
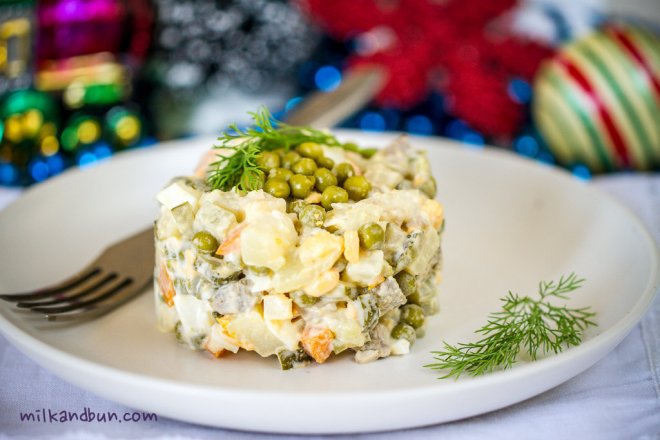
 Nowadays, the salad is still a traditional part of New Year celebration, but there are lots of versions – with boiled beef or chicken, beef tongue, fish and caviar, fresh or pickled cucumbers and so on. My recipe is a common version of the Winter Salad – with boiled beef, pickled cucumbers and mayonnaise. It’s a little bit on a dark/unhealthy side of my diet 😀 but consuming it on the holiday dinner is also a part of Russian tradition, so eating it once a year don’t make anyone fat. 🙂 Enjoy!
Olivier or Russuian Winter salad

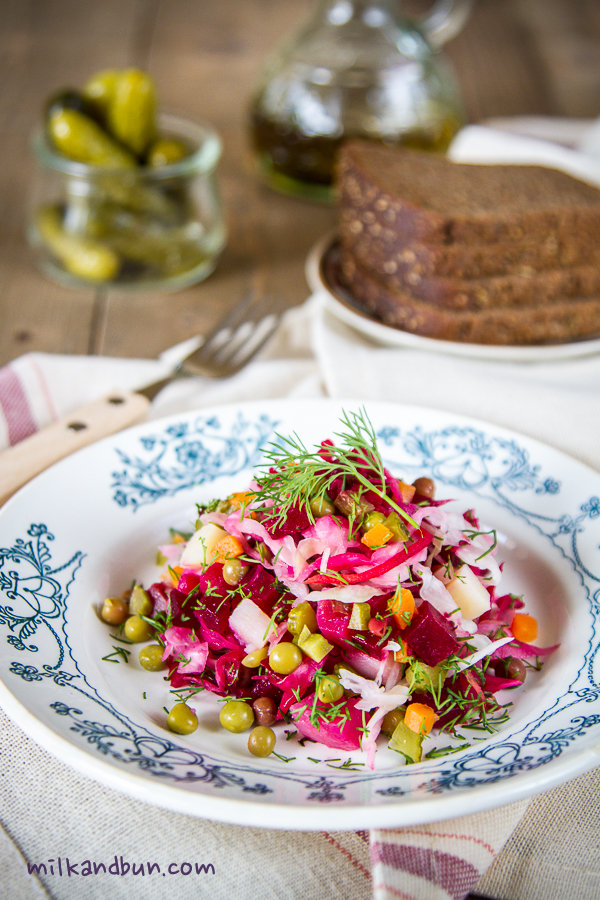
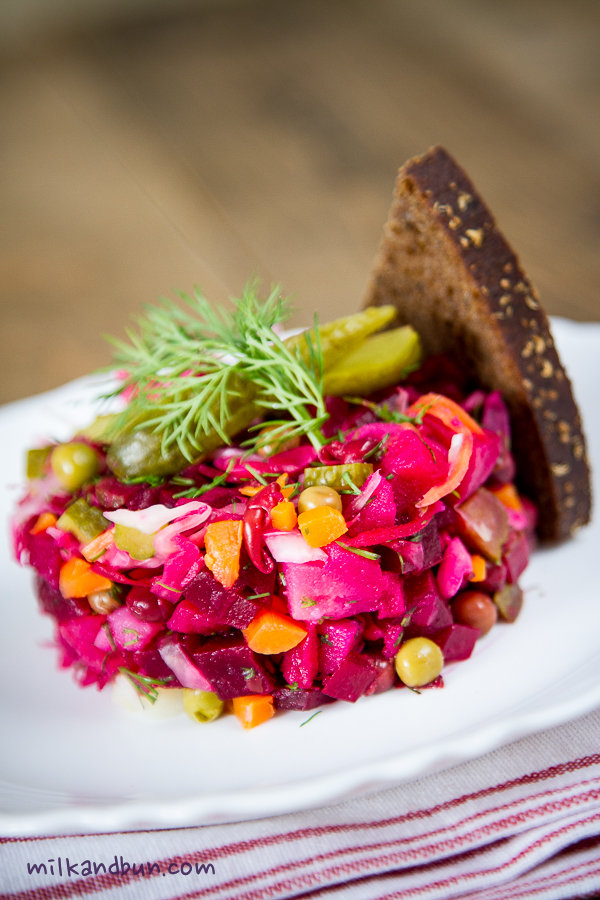
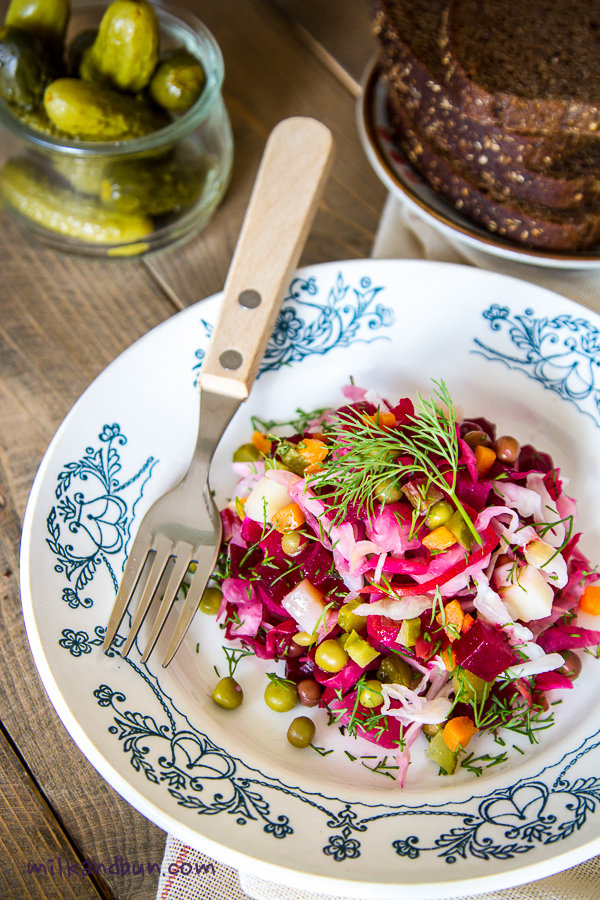
Russian winter salad (Olivier salad)

  • Servings: approx 8
  • Difficulty: easy
  • Print
You can garnish the salad with some peas and chopped dill or parsley.
*Add more cucumbers if using small gherkins.
Ingredients
350g beef (one whole piece, without any bones)
300g/ 2 large potatoes
1 large or 2 medium carrot
4 medium eggs
4 medium pickled cucumbers*
1/2 medium brown onion
1 can of green pea
mayonnaise, to taste
salt, to taste, optional
Method
  1. In a pan, put meat and cover with cold water, bring to boil, reduce the heat to medium, cover and simmer for about 50 minutes or until meat is ready. Completely cool and cut the meat into small cubes (about 1 cm).
  2. In another large pan, put potatoes and carrot in their skin, cover with water, bring to boil, reduce the heat to medium, cover and simmer until veggies are soft. Cool, peel and cut into small cubes (about 1 cm).
  3. In another pan, hard-boil eggs. Also cut into cubes.
  4. Finely chop the onion, put in a bowl, drizzle with some apple vinegar and cover with hot water. Leave for 15 minutes, then drain.
  5. Also cut the cucumbers into small cubes.
  6. In a large serving bowl, add all ingredients along with drained peas. Dress with mayo to suit your own taste.
You can keep the undressed salad in the fridge up to 2-3 days.
Enjoy Russian Winter Salad!

Vinegret

 Merry Christmas to you dear reader, to all amazing foodbloggers and friends, to all lovely people who is celebrating this bright and warm holiday!

 I’m sharing with you this wintery salad, that’s very popular and loved among Russians. It’s a vegetable salad, that usually served cold as a starter (before the main course) or lots of people would like to have a huge bowl of this salad any time during the day.

 Similar salads were known already in 19th century, which were made from boiled vegetables and dressed with oil and vinegar. The name ‘vinegret’ came from French word “vinaigre” – vinegar. The legend says that during the reign of Russian tsar Alexander I, French chef Antoine Careme was working for the Russian court and once he saw how Russian cooks prepared a vegetable salad and dressed it with something similar to vinegar. He wanted to know what was the dressing and asked ‘Vinaigre?’. As for cooks, they thought the chef named the salad itself.. Since then the salad became known as ‘vinegret’.Vinegret-Russian salad
 The salad is very simple itself and easy to prepare, it consists of few main and irreplaceable ingredients: beetroot, potato and carrot. Plus some points below and you can make it too:
-you can either boil beets and potatoes or bake it (in their skins);
-green canned peas are added most of the time, but you can skip it;
-not the least ingredient – pickled cucumbers or cabbage, you can use one of it or both;
-chopped fresh onion can be omit or replace with spring onions;
-some chopped fresh dill make the salad only better;
-dress it simply with aromatic sunflower oil (or olive oil), some vinegar is optional.
 All vegetables should be cut into small cubes (0.5-1cm). And the quantity is next: 1 part beets+1 part potatoes+1/2 part carrot+1 part pickled cucumbers or cabbage (I prefer and recommend 2 parts)+1/2 part peas+1/3 part onions.
Vinegret (modern presentation)
Moreover, today is a big day for Fiesta Friday party! It’s #100! I absolutely love it and enjoy it every time, so many recipes and lovely bloggers, fun and chat! Let’s party!!!

Vinegret

  • Servings: 4-6
  • Difficulty: easy
  • Print
*Cucumbers shouldn’t be too sour or too sweet.
**Try to buy Russian pickled cabbage (it should be crunchy!).
***I used small can 200g, drained weight 140g.
Ingredients
1 medium beetroot (300g)
300g potatoes
1 medium carrot
6 small or 2 medium pickled cucumbers*
200g Russian pickled cabbage**
1 small can of green peas***
small bunch of fresh dill, chopped
extra virgin olive oil, for dressing
salt and black pepper, to taste
Preparation method
  1. In a large pan, add cold water, put beetroot, potatoes and carrot (don’t peel them). Bring water to boil, reduce heat to low-medium, cover with a lid and simmer for 1 hour or until veggies are soft and ready. Drain, leave to cool completely. Peel veggies and cut into small cubes.
  2. Cut cucumbers into small cubes.
  3. In a large serving bowl, mix all vegetables with peas and dilll. Season with salt and pepper, dress with oil, stir to combine and serve.
Serve vinegret with sliced rye bread. Enjoy!
Russian vegetable salad -Vinegret

Sunny pie

 Today is the winter solstice, it is an astronomical event that occurs twice a year (summer and winter solstice). Winter solstice is the shortest day and the longest night of the year. During the paganism time in old Russia this day was a special celebration, which was called Yule night. It was a festive and holy day for the honour of greeting the baby-sun named Kolyada, that was born on this night, which slowly but steady began to be stronger and brighter. That means that with each upcoming day nights became shorter, days longer and sun shone brightly and warmly. In the night people had to get together (there was a superstition that to stay alone in this night was unluckily), they set a big festive fire, sang songs and burnt all old and useless stuff; people also prepared chickens and turkey, baked round pies and praised the Sun.Sunny pie

 As you can see, I’ve tried to make a sun-looking pie. Rich and sweet pastry holds lemon-scented milky filling and all covered with lightly soured apricot puree.  In a word, I liked this bright and tasty pie! It reminds me another pie that I made – ‘cottage cheese and cranberry pie’, so if you liked that one – give a chance to this sunny pie as well. 🙂Sunny pie with lemon-tvorog filling
Bright and Sunny Pie

Lemon-tvorog pie with apricot top

  • Servings: 6-8
  • Difficulty: moderate
  • Print
I used 20cm loose-bottom baking pan.
*Tvorog is Russian cottage cheese, you can find it in many European or Russian stores.
Lemon-tvorog pieA slice of sunny pie
Ingredients
sweet lemon pastry
400g tvorog*
100g butter,  at room temperature
zest of 1 medium lemon
3-4 tbsp lemon juice
1/2 tsp vanilla extract
3 medium eggs
30g (3 tbsp) brown sugar
30g (3 tbsp) white sugar
60g golden raisins
hot black tea or water, to cover the raisins
2 tsp cornmeal
apricot top
Preparation method
  • While the pastry case is baking, prepare the filling.
  • In a small bowl, put raisins and cover with hot black tea or water. You can also add a tablespoon of cognac or brandy for extra flavour. Leave to soak while making the diary filling.
  • In a large bowl, whisk tvorog with butter until just combined. In another bowl beat eggs with sugars.
  • Add lemon zest and juice, vanilla and beaten eggs to the tvorog mixture, beat until just combined.
  • Drain raisins and mix into the filling along with cornflour.
  • Pour the filling into the pastry case. Pour the apricot puree over the tvorog filling.
  • Bake in preheated 190C oven for 45-50 minutes. If the top begins to burn – cover it with foil.
  • Let it cool in the pan for 10-15 minutes, then carefully transfer onto the serving plate. Enjoy!
P.S. The filling wasn’t smooth as you can see from the pics, if you like it -ok, if not- you may push tvorog through the sieve.
Sweet lemon pastry
170g butter, at room temperature
50g golden caster sugar
zest of 1 small lemon
1/2 tsp vanilla extract
1 egg (40-45g), at room temperature
260g plain flour
Glaze: 1 small beaten egg yolk, optional
  • In a large bowl, whisk butter with sugar until just creamy. Add lemon zest, vanilla and egg and mix until just combined. Mix in flour. Cover the pastry with plastic wrap and chill overnight or up to 3 days until ready to use.
  • Roll out 3mm-thick (or as thick as you like) circle to cover your baking pan. You can also make ‘sun rays’ and stick them to the base and sides of the pan, but it’s optional step. If you have any pastry remains, roll out it and cut out cookies, then bake it on a baking tray for 10-12 minutes.
  • Put the pan with pastry into the freezer for 10 minutes.
  • Cover the pastry case with foil, add beans/rice/special stones for baking and bake in preheated 190C oven for 20 minutes. Then remove the weight, brush with the glaze (optional) and return to the oven for 5 minutes more.
Apricot Top (optional)
5 small sliced apricots (150g) (or sub with apricot jam)
2 tsp lemon zest
1 tbsp lemon juice
2 tsp cornflour
20-30g (3 tbsp) golden caster sugar
  • Beat all ingredients with electric blender into a smooth puree. The apricot top was slightly sour, if you like sweeter -add more sugar.
Enjoy!
 Lemon-tvorog pieSharing with wonderful and full of fun Fiesta Friday party!

Tsvetaeva Apple Pie

On this day, 8 of October, 123 years ago one of the greatest poetess in Russian literature – Marina Tsvetaeva drew the first breath.

She was born in the intelligent family: her father Ivan was a famous philologist, art critic and a professor of Fine Art in Moscow University and mother Maria was a pianist. Marina Tsvetaeva begun to wrote here first poetry being a 6 years old child, her poetry was written not only in Russian, but also in French and German languages. Her mother was terminally ill with tuberculosis and that time was believed that a change in climate could help to cure the disease, so young Marina spend quite a long time in Italy, Switzerland and Germany; lately she studied French literature in famous Sorbonne University.
 Tsvetaeva published the very first poetry collection in 1910 on her own money..
 Russian Civil war (1917-1922) was severe time for the poetess and here own family. She rejected Russian Revolution and wrote the cycle of poems about the war, glorifying those who fought against the communists. While here husband joined the White Army (anti-communist), she had no support and lived in starvation with her daughters.
 In 1922 Marina Tsvetaeva left the Soviet Union and moved to Berlin, lately her family lived in Prague and finally settled in Paris. Unfortunately, living abroad didn’t made here life easier, they lived in poverty and were homesick for Russia. Tsvetaeva did whatever she could: began to write more prose because it made more money than poetry. Meanwhile, her husband and daughter were involved in NKVD (predecessor of KGB), and when French police interrogated Marina Tsvetaeva, she was shocked about news that her husband was a spy. Furthermore, police implicated here son in the murder of former Soviet defector.
 Finally, in 1939 she returned to Russia..
Tsvetaeva apple pie/ Slice
 Returning to the apple pie recipe and its name. It’s being said that such apple pie was served in the house of Marina Tsvetaeva and her sister Anastasia. Young Marina spent a lot of time with famous poets and writers on the literary evenings, and it’s been known that she served an apple pie to her visitors. I really want to believe that she really had an opportunity to participate and enjoy such evenings, where this tender and delicious apple pie was served. At least there was something striking and good in her life.Tsvetaeva apple pie (after the name of Russian poetess)

Tsvetaeva Apple Pie

  • Servings: 6-8
  • Difficulty: moderate
  • Print
You can make the dough one day ahead and keep it in the fridge.
Ingredients
Dough
150g butter, at room temperature
250g plain flour
4 tbsp sour cream, 30%
1 tsp baking soda
1 tsp apple vinegar or lemon juice
Filling
3 sour medium apples
1/2 lemon, juice
250g sour cream, 30%
1 large egg
1 tsp vanilla extract, optional
100g white sugar
2 tbsp plain flour
Method
  1. For the dough, in a large bowl, add butter, sift  the flour and mix until mixture resembles crumbs. Add sour cream. Dissolve soda in vinegar or lemon juice and pour in the dough mixture. Mix to combine. Knead a dough a bit, shape into a disk, cover in plastic wrap and put in the fridge for 30 minutes.
  2. Take the baking tin, grease it and line with baking paper. Roll the dough into the circle to fit the baking tin. Put the tin into the fridge.
  3. Preheat the oven to 200C.
  4. Peel (optional), core  and thinly slice apples, sprinkle with lemon juice.
  5. In a bowl, with electric or hand whisker beat sour cream with egg and sugar. Add vanilla, if using. Sift the flour. Whisk to combine.
  6. Take the baking tin with dough from the fridge. Arrange apple slices. Pour over the sour cream mixture.
  7. Bake for 20 minutes. Then reduce the heat to 180C and bake for 25 minutes more. If the top begins browning too much, cover it with a foil.
  8. Allow the pie to cool completely in the baking tin. Then carefully transfer the pie onto the serving plate. Slice and serve with cup of hot tea.
The remaining pie cover with a foil and keep in the fridge up to 2 days. The pie will be even better on the next day, as the cream becomes thicker.

Boyar Millet Kasha (Porridge)

 Millet is a tiny and round-shaped grain, that usually has a yellowish color. It is edible (and it’s not only for feeding birds) and delicious grain with mild nutty taste. Millet is a quite popular grain in Russia, though not that much as buckwheat, but still it’s widely used and served as a savory side dish or breakfast cereal; and it is also good for adding to stews and soups.
 Millet is more than just an interesting alternative to common grains, it is a good source of anti-oxidants and vitamins, especially folic acid, niacin, calcium and iron. Millet is high in fiber and contains no gluten. Moreover, it helps to regulate blood sugar level, which is helpful for diabetics and those trying to lose weight.
Have you ever tried or cooked millet? What’s you favourite way to consume it?
Sundat Breakfast: Millet Kasha
 I called today Sunday Breakfast ‘Boyar Millet Kasha (Porridge)’. Boyars were members of the highest rank of the feudal aristocracies in 9-16th centuary in old Russia. They were immensely powerful people and occupied the highest positions in the government: boyars were the major legislators of old Russia, as members of The Boyar Duma (the advisory council to Tzar). Needless to say, it was extremely wealthy class with various privileges. I guess, their everyday food was diverse too, including spices and nuts (which were expensive and not affordable to the lower class), and they could enjoy this beautiful and delicious millet porridge. 🙂Boyar Millet Kasha (porridge)

Russian Boyar Millet Kasha (Porridge)

  • Servings: 3
  • Difficulty: easy
  • Print

Ingredients

Millet
200g millet
400ml milk
300ml water
a pinch of salt
1 tbsp sugar
Topping
50-60g black or brown raisins
1 large apple
1 tbsp sugar
1 tsp cinnamon
1/2 tsp vanilla, optional
50ml warm water
30g butter
2 tbsp sour cream, optional
2 tbsp chopped walnuts
2 tbsp honey
  • Wash millet thoroughly under running water.
  • Warm the milk and water in a medium saucepan, add millet, salt and sugar. Reduce heat to low, and simmer for 15-20 minutes or until millet is ready, stirring occasionally. The millet should be creamy, so add more hot water if it’s too dry.
  • Meanwhile, soak raisins in hot water for 5-10 minutes, drain.
  • Cut the apple into small cubes. In a small pan, add apple cubes, sugar, cinnamon, vanilla, water and simmer over medium heat for 5 minutes or until apple soft.
  • Stir in butter and sour cream, if using. Stir raisins and apple into the millet (or top). Top with nuts, raisins and drizzle the millet porridge with honey. Serve warm.
Enjoy!
Boyar millet porridge with apple and black raisins