Tag Archives: winter cooking

Coconut panna cotta

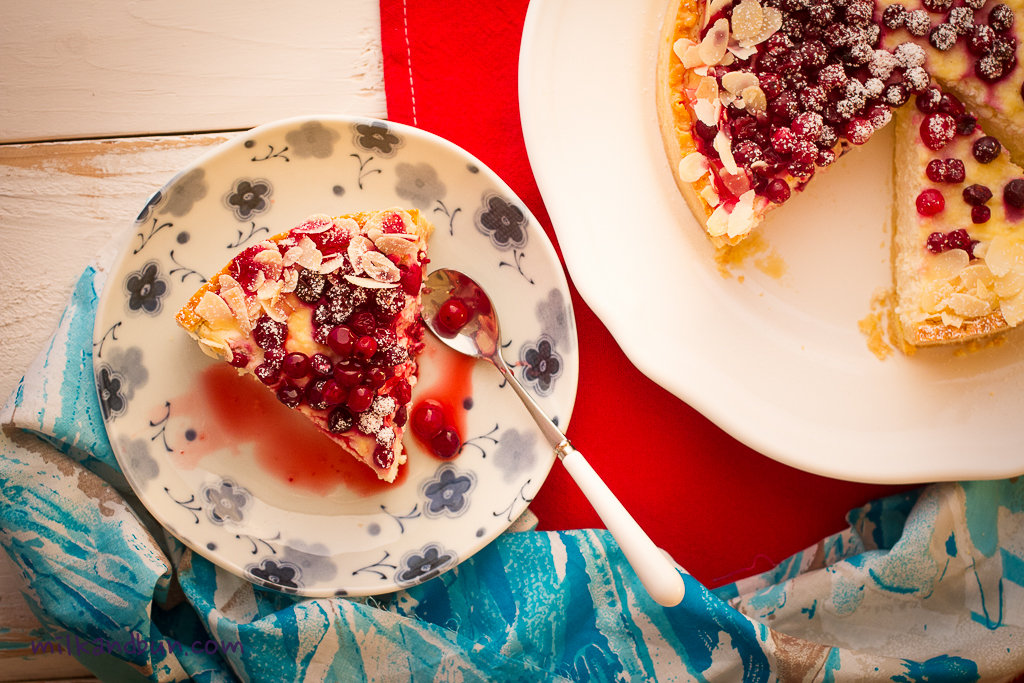
Panna cotta is such a universal dessert that suits any season, whether it’s freezing winter or hot summer. Cold panna cotta being served straight from the fridge with some fresh chopped strawberries is a perfect refreshing dessert for a sunny day; but if you take it out from the fridge a lit bit ahead of time, while quickly prepare super easy but super aromatic topping, like rosemary-scented mandarins, or quick sauté fresh cubed apples in a butter with a pinch of cinnamon and nutmeg – and you have got a nice dessert that warms you up on a cold day.
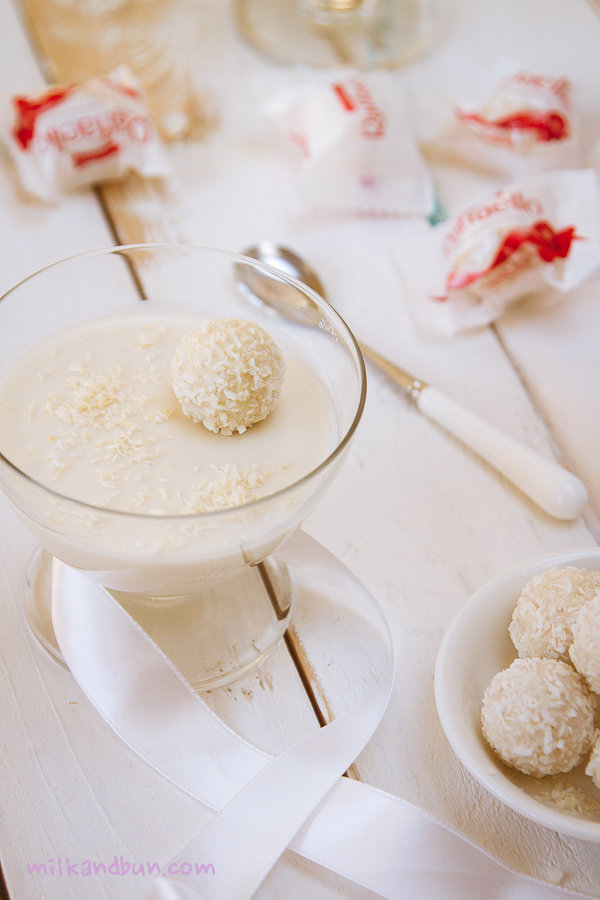
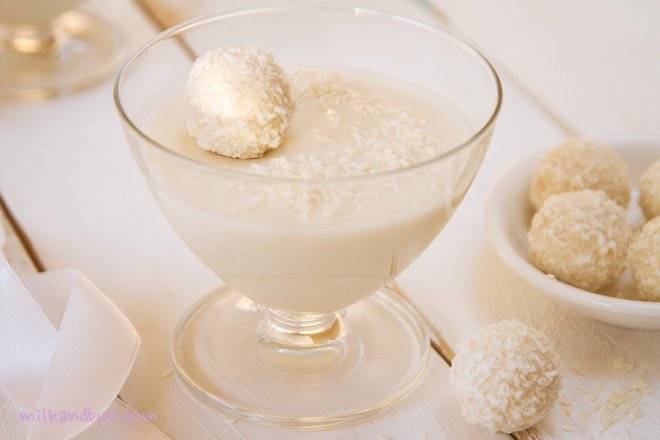
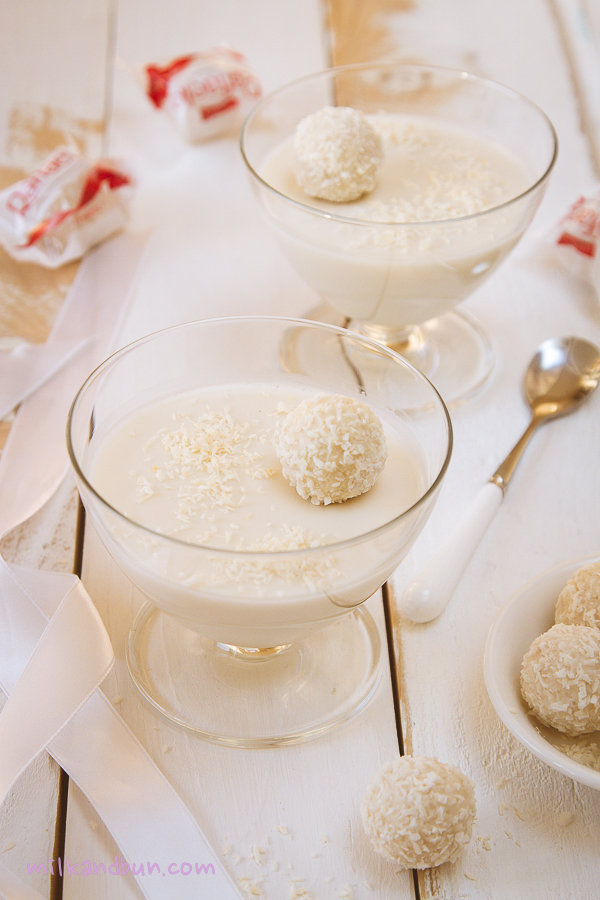
 I have noticed that I make this dessert during cold months here: probably I miss the snow and the white color of panna cotta reminds me winter in my hometown… This time the idea to garnish panna cotta with coconut candies and flakes came to my mind, so I decided to add coconut milk to the mixture instead of using only regular milk or cream.
Coconut panna cotta
It looks like a mountain, which is completely covered in snow. Doesn’t, it? and those candies are like small snowballs, that little children make to play in a snow fight.
Coconut panna cotta/cup
TIP: If you sprinkle panna cotta with red and pink edible hearts – it can be a lovely dessert to impress your other half on a St.Valentine Day.
panna cotta with coconut milk
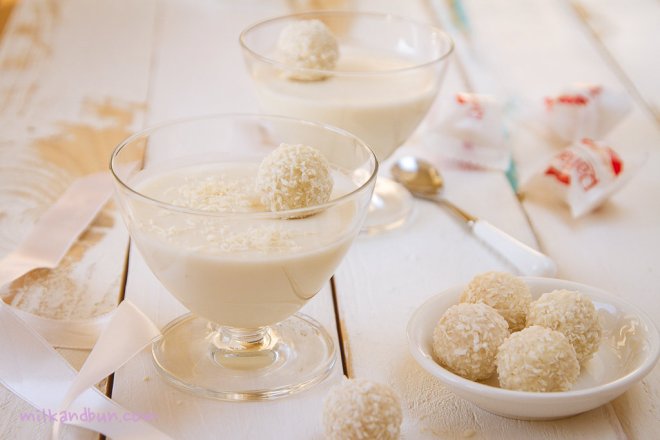
I serve panna cotta in glasses, but If you prefer, you can grease cups/ramekins with some oil and pour panna cotta in it, and then when it’s set and firm untold it before serving onto small individual plates.

Coconut panna cotta

What You’ll Need
2 tsp gelatin powder
3 tbsp cold water
1/2 can coconut milk (about 180ml)
250ml whipping cream (or heavy cream)
60g white sugar
1 tsp vanilla
coconut candies and flakes for garnish, optional
How to Make it
  1. In a small bowl, add cold water and sprinkle with gelatin, and let stand for 5 minutes.
  2. Meanwhile, in a small pan over medium heat,  heat the coconut milk, whipping cream, vanilla and sugar until sugar is dissolved, (but not simmer). Remove from the heat.
  3. Add softened gelatin to the creamy mixture and stir until gelatin is completely dissolved.
  4. Divide the pan cotta mixture evenly among prepared cups/glasses. Cover with plastic wrap and refrigerate until set, at least 4 hours or overnight.
  5. Garnish with coconut candies and flakes before serving.
Enjoy!
Coconut panna cotta//with coconut candies

Russian Beetroot Caviar

 This bright beetroot dip doesn’t contain salmon or any other fish raw. In my home-country vegetable spreads and dips that are mushed into a non-smooth consistency are often called caviar. In USSR fish caviar was an expensive product and most of the time was served over special occasions, but people have always wanted something tasty not only during holidays or weekend; and such vegetables as an eggplants, marrows and beetroots were cheap and available almost throughout the year, thus I guess economical version of the “caviar” was created.

russian-beetroot-caviar

 The recipe I found in a book dated 1990, it calls to boil beetroot, fry onions and press through the  meat-grinder machine along with other ingredients. Easy-peasy. It turned out so tasty, that i have already made it few times in a row! Moreover, it was a hit at the home-party, especially when I served this dip nicely decorated with little festive crackers; needless to say, guests asked for the recipe!
 The original Russian recipe calls for the salted pickled cucumbers, which are usually watery and personally I don’t like its taste, so I used regular crunchy pickled cucumbers and the beetroot dip was absolutely amazing and delicious! I prefer slightly coarse a caviar-like texture, so I don’t blend ingredients too much, but if you wish – just blitz it more to get the smooth dip. Enjoy!

Russian Beetroot Caviar

  • Servings: 4
  • Difficulty: easy
  • Print
Ingredients 
400g/2 medium-size beetroots
2 tps olive or sunflower oil, for frying
1/2 large brown onion
~100g pickled cucumbers
2 cloves of garlic
Salt&Pepper, to taste
Method 
  1. Boil beetroots until soft. Cool, clean and chop.
  2. Chop the onion and fry in a oil until soft and golden, about 5 minutes.
  3. Finely chop cucumbers. Also finely chop or mush garlic.
  4. Blitz all ingredients in a food processor until desired consistency.
  5. Check the seasoning. Serve with rye bread or crackers.
Enjoy!

Gingerbread cookies

 Holiday Greetings! Merry Christmas! May this amazing and magical time of the year will be filled with joy and happiness, and sparkle with moments of love and laughter!
 Winter holidays are about spending time with your family, loved ones and close friends. In this lovely season you may find lots of little things to do, simple things which make you truly happy. I love watching ‘winter’ movies, while eating mandarins or some traditional festive salads, or what a pleasure to wrap up in a cozy blanket and sip hot cinnamon tea, reread favourite book and of course baking! This year I haven’t had time as much as I wanted to spend over baking, but I’d like to share with you my recipe of gingerbread cookies. What a winter without cookies, right? And I can’t wait when my little pie will grow up and we will be making festive cookies together!
xmas-moose

Gingerbread cookies

Ingredients
100g butter
100g brown or raw sugar, or mix
1 large egg
4 tbsp/50g molasses
200g or more plain flour
1/2 tsp soda
1/2 tsp baking powder
1/2 tsp salt
mixture of ground ginger, cinnamon, nutmeg, cloves

Russian Winter Salad (Olivier salad)

 This salad is a traditional dish in Russian cuisine, and most of the time it is associated with New Year celebration, when it’s always served on a festive table along with another popular salad – “shuba”.

 The very first and original version of this salad was invented in the beginning of 1860s by chef Lucien Olivier, who was the owner of the renowned Moscow restaurant “Hermitage”. “Olivier Salad” quickly became popular among restaurant visitors, the salad brought him a great fame and became the signature dish. The recipe and especially the dressing was kept in a big secret, and unfortunately the fact is that the exact recipe is still unknown. But according to some notes, it’s known that the salad contained hazel grouse, veal tongue, black caviar, fresh salad leaves, crayfishes or lobster, some pickled, fresh cucumbers, capers and boiled eggs. And the secret dressing was prepared from fresh raw eggs, some secret herbs and olive oil. 
 As you can see, all ingredients were posh and expensive. So, lately during Soviet time, these fine ingredients were replaced by cheap and widely-available, like boiled kolbasa (bologna sausage) or meat, boiled potatoes and carrots, pickled cucumbers and peas, dressed with store-bought mayonnaise instead of home-made French dressing. Such simple and nourishing salad was widely-popular, and soon it became a staple and traditional dish of Soviet holiday dinner, and particularly of New Year’s Eve. Lately, it’s even got a second name – “Winter Salad”. Beyond Russia this salad is often called as “Russian Salad”.Russian Winter salad
 Nowadays, the salad is still a traditional part of New Year celebration, but there are lots of versions – with boiled beef or chicken, beef tongue, fish and caviar, fresh or pickled cucumbers and so on. My recipe is a common version of the Winter Salad – with boiled beef, pickled cucumbers and mayonnaise. It’s a little bit on a dark/unhealthy side of my diet 😀 but consuming it on the holiday dinner is also a part of Russian tradition, so eating it once a year don’t make anyone fat. 🙂 Enjoy!
Olivier or Russuian Winter salad

Russian winter salad (Olivier salad)

  • Servings: approx 8
  • Difficulty: easy
  • Print
You can garnish the salad with some peas and chopped dill or parsley.
*Add more cucumbers if using small gherkins.
Ingredients
350g beef (one whole piece, without any bones)
300g/ 2 large potatoes
1 large or 2 medium carrot
4 medium eggs
4 medium pickled cucumbers*
1/2 medium brown onion
1 can of green pea
mayonnaise, to taste
salt, to taste, optional
Method
  1. In a pan, put meat and cover with cold water, bring to boil, reduce the heat to medium, cover and simmer for about 50 minutes or until meat is ready. Completely cool and cut the meat into small cubes (about 1 cm).
  2. In another large pan, put potatoes and carrot in their skin, cover with water, bring to boil, reduce the heat to medium, cover and simmer until veggies are soft. Cool, peel and cut into small cubes (about 1 cm).
  3. In another pan, hard-boil eggs. Also cut into cubes.
  4. Finely chop the onion, put in a bowl, drizzle with some apple vinegar and cover with hot water. Leave for 15 minutes, then drain.
  5. Also cut the cucumbers into small cubes.
  6. In a large serving bowl, add all ingredients along with drained peas. Dress with mayo to suit your own taste.
You can keep the undressed salad in the fridge up to 2-3 days.
Enjoy Russian Winter Salad!

Cottage cheese and cranberry pie

Winter holidays are almost here and I can’t wait to celebrate! Holiday preparation is already well underway and it can be stressful, but I love this hustle and bustle season: frenzied shopping, decorating homes and work places, buying delicacies and champagne, choosing and wrapping gifts for family and friends. I’m absolutely absorbed in the planning of New Year dinner. Shopping list is written, salads and starters are chosen, goose and turkey are waiting in the freezer. And certainly I couldn’t forget about desert. For me it’s an important and sweet part of the dinner. Any festive dinner should be finished with a perfect cake! Have you chose the one? What will be the sweet star on your table? Will it be traditional cake or pudding, that you make every year or a fancy cake, that you’ll order from a restaurant?
Cottage cheese and cranberry pie
 This year I’ll be making the vanilla cheesecake with cranberry or red currant compote. It sounds simple, but that’s exactly what we need this winter – delicious, smooth and tender cake. 🙂 But if you’re tired and bored from all traditional desserts, why don’t you try my festive cake recipe. It seems similar to cheesecake, but I used tvorog (cottage cheese) and sweet condensed milk, and its taste and structure became different. Bright cranberries on the top make this milky and sweet cake absolutely festive! Definitely all guests’ eyes will be on this cake!
CCC Pie
 If you noticed cranberries are small, because it’s Russian, they are smaller and juicier compare to American cranberries. Needless to say, you can use any cranberries you can find, or frozen cherries are also great here.
Festive Pie with cranberries

Cottage cheese and cranberry pie

  • Servings: 6-8
  • Difficulty: moderate
  • Print
A new take on the vanilla cheesecake, this cake will go down well on any occasion.
IngredientsCranberry Pie
Crust
260g flour
160g butter
1 small egg
2-3 Tbsp caster sugar
1 egg yolk for brushing the pastry crust, optional
Filling
450g tvorog/cottage cheese
3Tbsp cream cheese, optional
3-4Tbsp sweetened condensed milk
2 large eggs or 3 small
2 tsp granulated sugar (or omit it and add more condensed milk)
1 tsp vanilla extract
1 Tbsp cognac or brandy, optional
3 Tbsp ground almonds
100-150g cranberries
almond flakes, for decoration
icing sugar, for decoration, optional
Preparation method
  1. Make the cake crust. Cover and rest in the fridge for 30 minutes. Roll out 3mm thick and cut a circle larger than 20cm (approx.26-28cm) baking pan. Bake blind in preheated 180C oven for 20 minutes. Then remove the weights, optionally brush with egg yolk, then return to the oven and bake for 5-6 minutes more.
  2. Meanwhile, in a large mixing bowl beat eggs with condensed milk and sugar if using until the mixture is pale and sugar almost dissolved. Add vanilla, cognac, cream cheese and mix.
  3. If the cottage cheese is very crumble first mash it with a fork, then add to the filling mixture along with ground almonds, and stir to combine. Taste, add more condensed milk if it’s not enough sweet.
  4. Pour the filling into pastry crust. Arrange cranberries on top, and decorate with almond flakes.
  5. Reduce the heat to 170C and bake in the oven for 35-40 minutes or until the filling is set.
  6. Let it cool in the baking pan for 10 minutes, then carefully take out and put on a serving plate. Sprinkle with icing sugar, if desired.
  7. Enjoy!

Cranberry and cottage cheese pie