Cakes

WhiteCurrant tart

 Hello-hello! I love summer because it’s berry season! May be not that summer when the outside temperature is +40C or even 50C.. Hope you are having the same great summer as I do this time in Russia: lots of organic berries, vegetables and greens, amazing weather, long walks and talks with friends. But sometimes the weather plays a joke: in the morning can be so cold that you need a thick jacket, later so hot – you need a dress instead of jacket, and so on..Russian FieldRussian Nature
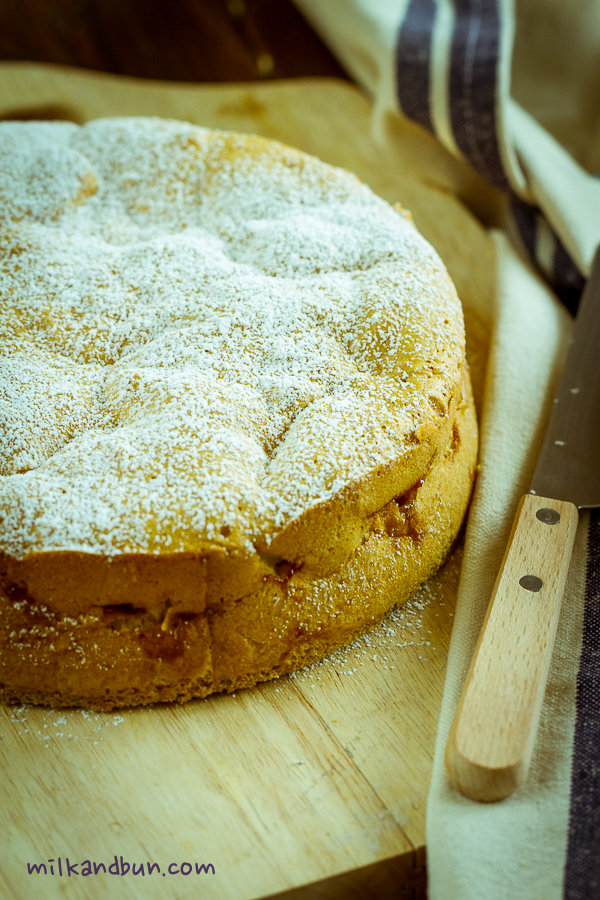
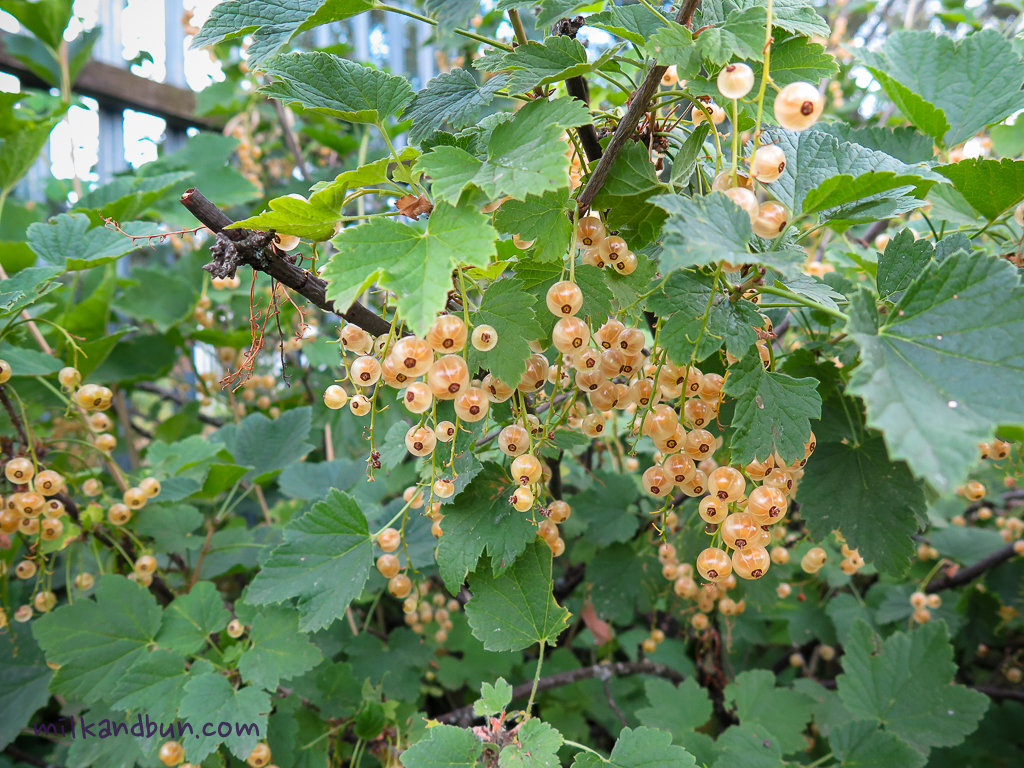
 Talking about summer berries, currants is super common and one of the popular type of berry in Russia. I’m sure many of you tried redcurrants or seen it in supermarkets, or tried a dessert garnished with it. Here, there are three types of currants: black, red and white. They differ from one another not only in their color; blackcurrant is the sweetest one, red is tender and sour, and whitecurrant is sweet-and-sour with lots of seeds. And I guess, the white one is less-known, so I’ve been determined to make something tasty with these beautiful berries. Here, they are usually eaten as is or they make compotes (cold drink), jams. I made shortcrust pastry with tvorog (cottage cheese), filled with tender tvorog filling (yes, again cottage cheeese! I love it!) and scattered whitecurrants over the top. Yummy! A slice of whitecurrant tart
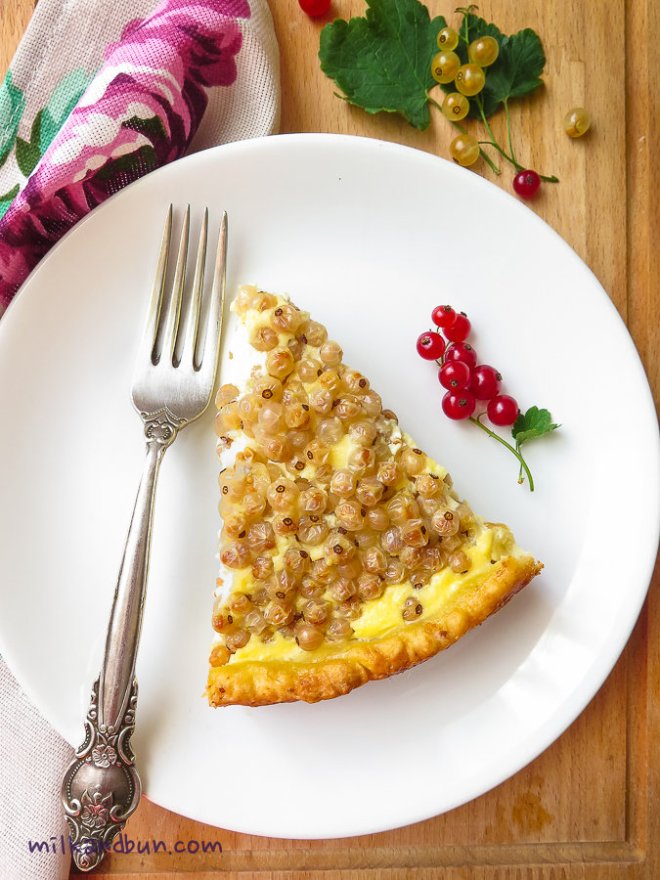
 So, how is your summer going on? 🙂
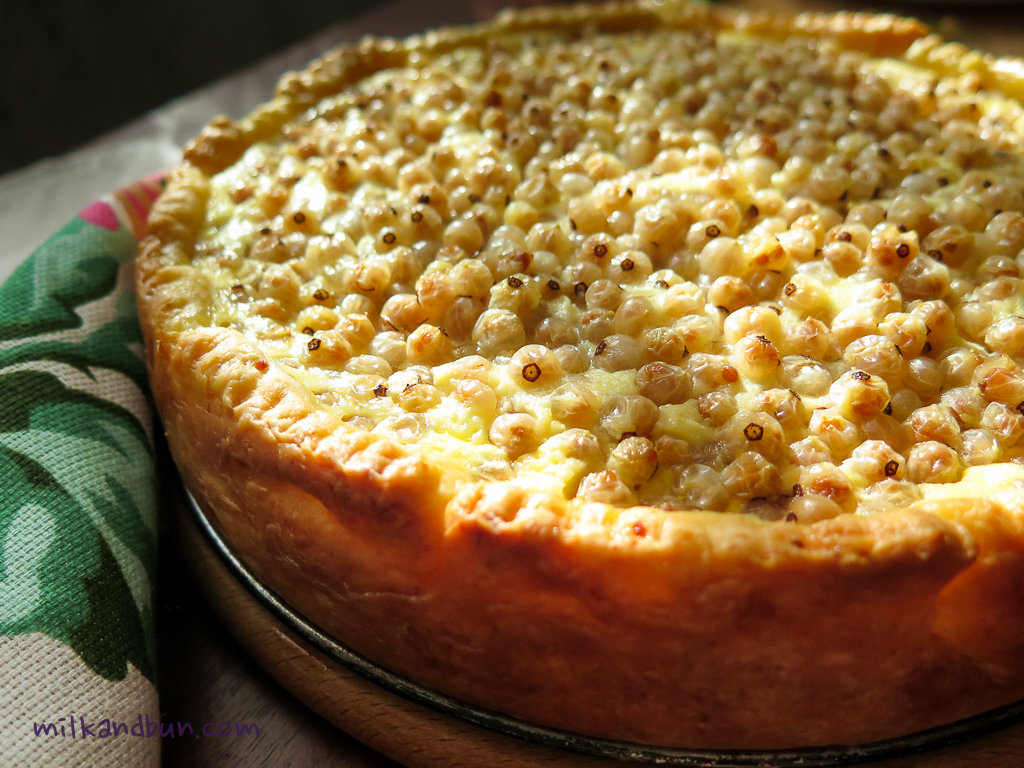
White Currants in RussiaWhite Currant Tart

WhiteCurrant tart

  • Servings: 6-8
  • Difficulty: easy
  • Print
The recipe calls for whitecurrants, which are usually uncommon, so use redcurrants or any berries that you can get.
If you’re using frozen berries, don’t defreeze it.
I used 22cm baking tin.
Ingredients
Pastry
200g flour
100g butter, cut into small cubes
100g tvorog/cottage cheese (I used 0% fat)
1 egg
Filling
3 eggs
70-100g sugar or fructose (depends on your taste)
300-350g sour cream (20-30% fat)
100g tvorog/cottage cheese (I used 0% fat)
1 tsp vanilla sugar/extract
450-500g whitecurrants
Preparation method
  • To make the pastry, place flour, butter in a large bowl (or in the food processor) and mix to get breadcrumbs. Mix in tvorog. Add egg and mix until just comes together. Shape into a disc, cover with plastic wrap and place in the fridge for 30 minutes.
  • Roll the pastry on a lightly floured table to form a round. Grease the baking tin and lightly dust with flour. Arrange pastry into the baking tin. Place in the fridge to cool while you’re preparing the filling.
  • Preheat oven to 180C.
  • In a bowl, whisk eggs with sugar. Beat in sour cream. Add cottage cheese and vanilla, whisk to combine.
  • Take the pastry out the fridge, pour in filling. Scatter over berries.
  • Bake for 35-40 minutes. Leave to cool in the baking tin, then carefully remove from the tin and serve.
Enjoy!

Sharlotka

 Sharlotka – that’s how one of the popular apple cake in Russia called. I believe this cake is so widely-known that there is no a man in Russian who wouldn’t heard about it. When I was a little girl I ate sharlotka so many times that I hardly can count, I ate it at my home, at friends’ home.. And I still love it! It’s one of the easiest recipe that always turns out great!
There are many varieties of Charlotte dessert. Russian ‘charlotte’ was created by French chef Marie-Antoine Careme who worked for Russian Tsar Alexander I in 19th century in London. Believed that the dessert took its name from Queen Charlotte, wife of George III of the Intied Kingdom, who loved apples. For this dessert the bottom of baking mold was lined with sponge cake or savoiardi biscuits, then filled with Bavarian and whipped cream, and completely cooled. Originally the dessert was named ‘charlotte a la parisienne’ but lately became popular under the name ‘charlotte russe’ or simply ‘Sharlotka’.
In Soviet times the recipe was modified and became sponge cake with apples. Nowadays, the cake continues to be liked and cooked by many Russian women, including me. 🙂 It’s also a kind of ‘rescue’ sweets that you can prepare in minutes when your friends came around unexpectedly. Below recipe is my mother’s recipe, I haven’t change a word in it and the cake turns out perfect every time, I think it will make my mummy proud and happy. ❤Sharlotka

Sharlotka

  • Servings: 6
  • Difficulty: easy
  • Print

You can also roughly chop apples, stir into the batter and then bake.
I used 20cm/8inch cake spring-form.
Ingredients
2-3 large apples, peeled, cored and sliced
3 eggs, at room temperature (better to use large eggs)
80g white sugar
110g plain flour
2 tbsp water
1/2 tsp b.soda
1 tsp lemon juice or vinegar
a pinch of salt
icing sugar for dusting, optional
Preparation method
  1. In a large mixing bowl, add 3 egg yolks, water and sugar. Put baking soda in a tablespoon, pour in lemon juice or vinegar, mix with a teaspoon to dissolve it, then pour into the egg mixture. Beat egg mixture until light and creamy.
  2. In another bowl, beat egg whites with a pinch of salt until soft but steady peaks.
  3. Gradually mix egg whites into egg yolk mixture. Don’t stir too much.
  4. Gradually sift and fold in the flour.
  5. Grease and dust with flour the baking form. Gently spread half of the batter into the form. Arrange apple slices. Pour in the rest batter, evenly spread.
  6. Bake in preheated 180C oven for 30 minutes.
  7. Sprinkle with icing sugar, if desired. Serve warm with a cup of freshly-brewed tea.
You can keep the cake in a box or on a plate covered with foil in the fridge up to 3 days.
Enjoy!

Sharlotka- Russian apple cake

Sharing this tasty cake with Fiesta Friday and all lovely bloggers who is enjoying it!

Plum cake

It’s a fact that spring came to this year-round sunny city too, and temperature start to creep slowly. During the day the weather is still nice for swimming and sunbathing without uncomfortable sweating like in the summer months. Another pleasure is to take an evening walk in the fresh air, or to sit outsite and enjoy sipping a tea while the weather is till cool. Having a tea without a piece of cake is absolutely wrong thing! 😀 So, you can guess that one of my favourite ‘indoor activities’ is baking! I had mascarpone cheese and ripe plums that used to be a jam, but mascarpone was nearly to expiry date and I had to use it somehow.. Plum cake ingredientsIt was a ‘mix all what you have’ cake, I also added a splash of cognac for an extra hit. After a half an hour of baking the cake was still uncooked and I was a bit worried. But the final result was a wonderfully divine and delicious cake! It was totally worth the wait: tender, moist and filled with amazing flavour! I will be making this cake again! 🙂Plum cake (with mascarpone and cognac)

Plum cake with mascarpone and cognac

  • Servings: 6
  • Difficulty: easy
  • Print
Ingredients for 18cm baking tin
50g butter, very soft
80g brown sugar
2 eggs, at room temperature
1 tbsp cognac (or brandy)
1 tsp vanilla extract
2-3 tbsp lemon zest, optional
100-120g mascarpone, at room temperature
100-110 g plain flour
1 tsp baking powder
4-5 dark plums, sliced
1 tbsp plum jam (or apricot jam), optional
Preparation
  • In a mixing bowl, beat the butter with sugar. In a separate bowl, beat eggs with cognac, vanilla and lemon zest. Gradually stir into the butter mixture. Fold in mascarpone cheese. Sift flour with baking powder into the batter, mix to combine.
  • Pour the batter into greased baking tin. Arrange plum slices on top. Bake in preheated 180C oven for 50-60 minutes or until the inserted toothpick comes out clean. Grease the top with jam. Let it cool slightly before serving.
Enjoy!
Tender and Tasty Plum cake

Crepe Cake with custard creme

 Yes-yes! It’s blini again! I was eating lots of crepes last two weeks, seems I need to stop. 😀 But this is the whole cake! Believe me, you need to try it once to be obsessed forever! 😉 Just few days back I was watching one video and Russian confectioner made sweet blini-cake, it was a sign to make it and of course to try new recipe of blini. It turned out to be easy to make, but get ready to prepare a lots of blini! Despite the fact that I used too wide pan and the stack wasn’t high as much as I wanted, blini turned out thin, tender and very tasty.Blini Cake with custard cream

 I decided to make custard cream (the confectioner made another cream), which is not very sweet and buttery. The quantity of the cream was more than enough for my cake, so I spread it on each crepe and put the cake in the fridge to set. Impatiently, I sliced into the cake, bite it and was surprised, the crepes absorbed almost all the cream. There was only the one way out – to eat it with sweet condensed milk on side. 😀 So, next time I will make double quantity of the cream.Crepe Cake

Crepe Cake with custard creme

  • Servings: 6-8
  • Difficulty: easy
  • Print
Before assembling the cake, allow the crepes and cream to cool completely.
The crepe-cake tastes also good on the second day and can be a tasty breakfast, if you manage to save a slice that long!
Thin Blini (crepes)
300g flour- sift in a bowl
1 tsp/5g salt
500ml milk
5 eggs, beaten
120ml water
70g butter, melted
Custard cream 
500ml milk, full fat
4 egg yolks
100g fine sugar
40g cornmeal
1 vanilla bean or 1 tsp extract
In a small bowl whisk together sugar and yolks until the mixture is pale. Add cornmeal while continuing to gently whisk the mixture.
In a pan bring milk with vanilla bean to a boil while constantly stirring and taking care not to burn it.
Gradually pour half of the hot milk into the egg mixture  while continuing to stir. Pour egg mixture into the pan with the other half of milk, continuously stir. Continue cooking and stirring to the point of the mixture becoming thick and custard forming – about 10 minutes.
Cool the custard completely.
Enjoy!

Pumpkin Cheesecake

 It’s my very first pumpkin cheesecake! 🙂 I do love both cheesecake and pumpkin, but never tried to combine them together until I baked too many pumpkin slices and already couldn’t eat them.
Cheesecake is enjoyed by millions around the world, and each person has its own take on the best way of making it. Truly a scrumptious dessert! I guess that the pumpkin cheesecake is the America’s favorite dessert. Moreover, I’ve heard about National Pumpkin Cheesecake Day, is that true? In Russia we eat pumpkin, too, but usually it’s sliced and simply baked with sugar, or whole pumpkin stuffed with grains (have a look at my recipe here).
I knew how to make a basic cheesecake, so I just added pumpkin puree and some spices. Oh, I’m so happy with the result! The only thing I was worried that it can be too wobbly, finally it set good, just cracked a little. The texture is perfect – creamy, deliciously smooth and not-very-sweet, everything how I like. Unfortunately, the cheesecake has some unwanted calories, thus for weight watchers I recommend to substitute cream cheese with low-fat cottage cheese or quark.Pumpkin cheesecake

Pumpkin Cheesecake

  • Servings: 8-10
  • Difficulty: easy
  • Print

You need 18cm baking tin for this recipeSlice of pumpkin cheesecake
Ingredients should be at room temperature
Crust
150g graham crackers, finely crushed
80g butter, melted
Filling
350g cooked pumpkin, then pureed
220-250g cream cheese
30g brown sugar + 40g white caster sugar
2 tbsp double cream (35% fat)
2 whole eggs + 1 egg yolk
2 tbsp cornstarch (cornflour)
1 tbsp plain flour
1 tsp vanilla extract
1/2 tsp cinnamon
1/4 tsp ginger powder
small pinch of ground cloves, allspice and salt
Method
  1. To make crust. In a medium bowl, blend butter with graham crumbs. Press the mixture into the base of baking tin to create an even layer. Chill for 10 minutes in the fridge, then bake in preheated 160C oven for 5-7 minutes. Take the tin out and let it cool for 10 minutes.
  2. To make filling. Meanwhile, in a large bowl, beat the cream cheese with sugar until smooth consistency. Add pumpkin and combine. Break one at a time, add egg yolk, mix to combine. Add double cream, cornstarch, flour and all spices. Beat until well combined. Pour the filling into crust, spread evenly and bake in preheated 180C oven for 45-50 minutes.
  3. Take the tin out of the oven, let it cool at room temperature. Cover the baking tin and refrigerate overnight.
  4. Remove cheesecake from the tin and slide onto a plate, slice and serve.
Enjoy!
[Click the photos for a closer look]