Breakfast

Chicken Liver Pâté

 Hey guys! To say the last few weeks of my life have been filled with sport, beach and meeting with friends, so I hadn’t been posting regularly and commenting on your lovely blogs, but I will resume blogging and posting more often. 🙂 And I want to share with you a simple but super delicious recipe –  chicken liver pate! The pate is very quick and easy to make, and require only a few ingredients. Another advantage is a low cost of chicken livers. Pureeing the cooked livers along with butter and a little cognac or brandy transforms the plain part of chicken into something magnificent! It’s a great breakfast on a slice of toasted bread or can be a nice appetizer topped with a cornichon or little pickled onion. 🙂Chicken liver pate

Chicken Liver Pâté

  • Servings: >6
  • Difficulty: easy
  • Print
If cooking for children, omit the cognac.
Ingredients
1 large onion
1 medium carrot
20g butter
500g chicken liver, cleaned
1+1 tbsp cognac (or brandy/whiskey)
1/2 tsp dried thyme or 1-2 tsp fresh leaves
a pinch of freshly grated nutmeg
50ml water or chicken stock
100ml cream  (12-15%)
50-60g butter, at room temperature
sea salt to taste
freshly grated black and white pepper to taste
Top
40-50g butter
 
Preparation
  1. Peel onion and cut into small cubes. Wash, peel and grate carrot.
  2. In a deep frying pan or saucepan, heat butter and add vegetables, cook on a medium heat until soft (don’t brown). Add liver and fry for 8-10 minutes. Add one tablespoon of cognac, herbs and season to taste. Simmer on a medium-low heat for 5 minutes. Add water, cream, bring to boil and turn off the heat. Leave to cool at room temperature.
  3. Transfer to a food processor or puree with hand blender. If the consistency is too thick, add more warm water or stock. Adjust the seasoning. Add soft butter, cognac and blend again.
  4. You can make a butter ‘lead’, for that heat the butter in a small bowl and pour over the cooled pate.
  5. Transfer pate to a bowl and keep covered in the fridge up to 5 days.

Enjoy! 


Maslenitsa (Butter Week). Blini recipe.

 Maslenitsa (Butter Week) is a Christian holiday, one of the brightest and widely-celebrated holiday in Russia, a week before Great Lent. The name Maslenitsa came from Russian word ‘maslo’ which means butter. In the beginning of 16th century, when Church initiated the holiday, it was restricted to eat meat, however fish was allowed, as well as dairy products and butter. Most of the peasants could afford to eat only butter, thus the week began to call Butter Week or Maslenitsa.
 During Druids’ times- before 16th century in Rus’ (old Russia’s name) was celebrated a pagan holiday – The Day of spring equinox, which was called Komoedica. It was one of the ancient pagan holidays, celebration of greeting spring, and moreover, worship of the Slavic Bear God: early in the morning people got together, song the songs and went into the forest to praise the Bear God, so they left first and freshly-cooked blini on tree stumps to treat him. After that the Butter Week revelry had been started.Russian stuffed blini (crepes)
 That time Spring was considered as a beginning of new life, people revered to the Sun and made round flat-bread as its symbol. But  in 9th century peasants began to make round-shaped blini. Hot and yellowish, blini became new symbol of the Sun; people also believed that with eating blini they had a piece of warmth and power of the Sun.
 In ancient times the Komoeditsa holiday was celebrated during two weeks and played an important role for peasants. After a long, cold and often starving winter people had to eat plenty of food (usually it was winter stock remains), cheered up and got stronger for future spring works. Butter week celebrations denoted that winter has passed, and it’s time for a warm season to come. After this holiday peasants began to work from sunrise until sunset during all warm months – spring, summer and autumn. Up to next snow season, they forced to work almost non-stop, without any weekends to get food for their families, fodder for cattle; they repair houses, and cut woods to keep homes warm during the long Russian winter.Russian Blini
 When Christianity was established as a state religion, all pagan celebrations and traditions were prohibited; Christian churchmen battle in a vain attempt to stop all holiday habits. After several centuries of unsuccessful fights, in 16th century the Church created new holiday – ‘meatless week’, the week before the Great Lent. People got used to the new holiday, started celebrate it widely and created other name – Maslenitsa.
 Finally traditional Maslenitsa celebrations were set in 18th century by Russian Emperor Petr I, who was a famous reveller and  party lover. Of course, the main treat was blini, which were baked and eaten in enormous amounts!
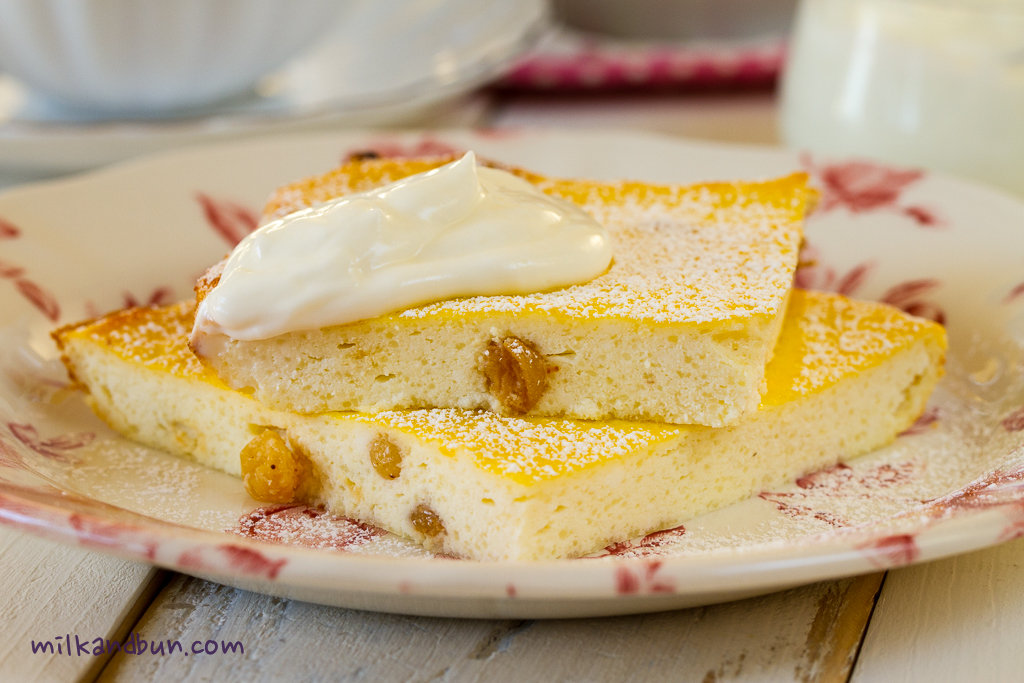
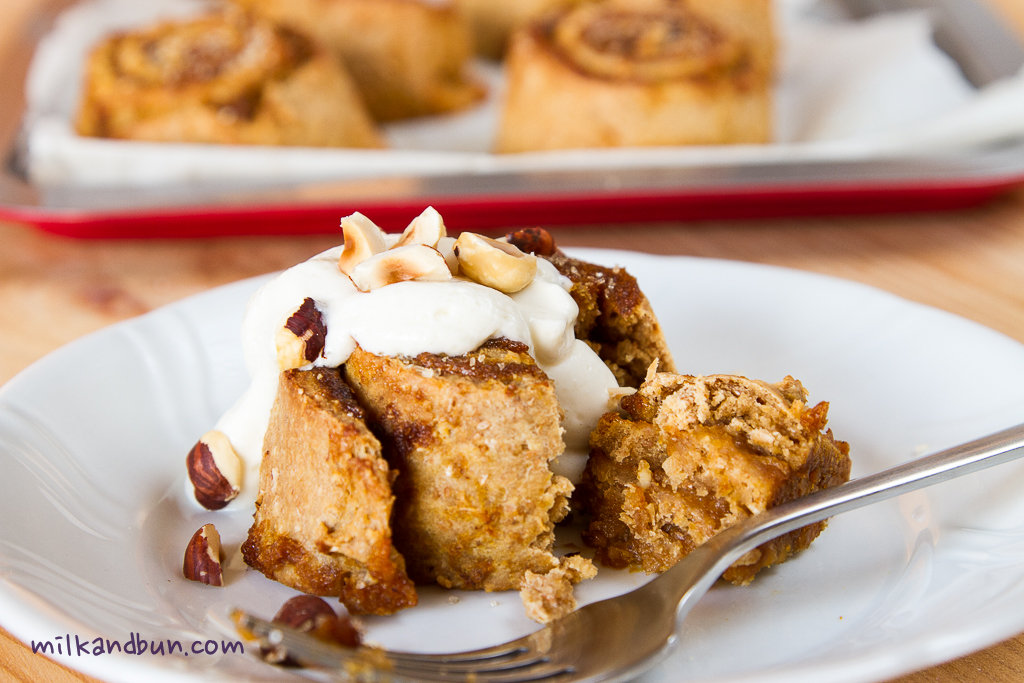
 One of my fav sweet fillings for blini is a mixture of tvorog (cottage cheese), sour cream, raisins and sugar. For me, it’s a pure indulgence to tuck the delicious filling into piping hot blini! You can also fold blini into half then half again to form wedge, then take the wedge and deep it onto sweet condensed milk.. Incredibly satisfying breakfast or lunch, or even dinner! 😀
 This blini recipe suits for any savory filling as well.

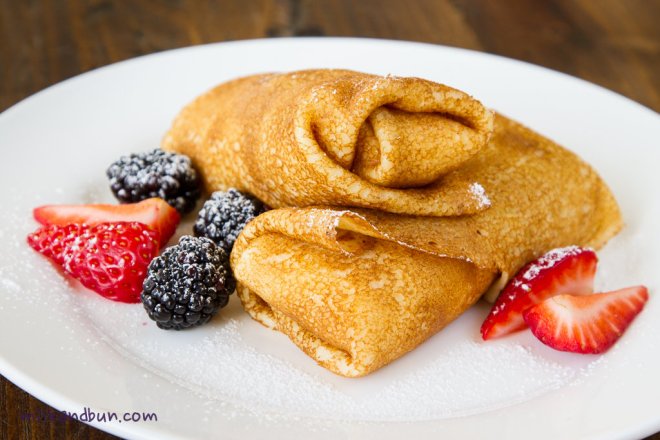
Russian blini. Sweet cottage cheese filling.

Ingredients 
2 eggs, medium size
a good pinch of salt
1-2 tbsp white sugar, optional
200ml hot water
1/2 tsp soda
200-230ml kefir (or sour milk/laban/buttermilk), 2-3% fat
150-170g plain flour
3-4 tbsp sunflower oil
some oil for frying, if needed
Filling
300-400g soft cottage cheese
2-3 tbsp sour cream, or more if needed
2-3 tbsp sugar or sweet condensed milk
50-60g sultana/raisins
Garnish
sour cream/sweet condensed milk/icing sugar
  • In a large mixing bowl, beat eggs with salt and sugar.
  • In a glass or cup mix water with soda, stir and add to the eggs, stirring constantly.
  • Add kefir and mix well.
  • Sift flour and add it to the batter. Stir to combine.
  • Add oil and stir.
  • Let the batter rest for 20-30 minutes, if you have time.
  • Heat the frying pan and fry thin pancakes as usual. You can make any diameter you like.
  • For the filling, soak sultanas in hot water for 5-10 minutes, then drain. Mix all ingredients until well combined.
  • To assemble, spoon some filling in center of each pancake. Fold bottom edge of pancake over fililng, fold in both sides and roll up. Sprinkle with icing sugar and/or drizzle some sweet condensed milk, if desired. Or serve with a dollop of sour cream.

Enjoy!

Tvorognaya zapekanka

 Tvorognaya zapekanka literally means a cottage cheese bake. This is a very special treat for me. It reminds my childhood and good time when I was going to the kinder-garden. Some of my friends do not share the same nice memories about the food in a kinder-garden, and even few of them hate any cottage cheese bakes (and not only bakes) and don’t want to believe that it can be so tasty! Thank God, I was luckier and remember not only huge onion chunks in a beef stew 😀 but also good meals, like this sweet cottage cheese bake and delicious plum jam.
 Speaking about tvorog (that’s how we called cottage cheese or farmer cheese in Russia, and it can be both smooth and chunky), I do like it and consume regularly: either as is or adding it to the apple pies and cabbage bakes. So, I’ve tried hundred times to make a bake somewhat childish, and every time it was too liquid or too sweet.. Finally, here it is! The bake is perfect! The only notice, maybe next time I will use a smaller baking dish to make the cottage cheese bake higher.
Russian cottage cheese bake

Russian sweet cottage cheese bake

  • Servings: 3-4
  • Print
If you’ve got a chunky and dry cottage cheese – push it through a sieve or stir with electric blender into a smooth mixture.
IngredientsCottage cheese bake
450-500g cottage cheese
40g butter, melted
2 medium eggs
3 tbsp white caster sugar
2 tbsp semolina (I used coarse, but fine is ok, too)
2-3 tbsp milk, warm
3 tbsp sour cream
a pinch of salt
1 tsp vanilla extract or any other vanilla
50g raisins/currants
Glaze (optional)
1 egg yolk
1tsp icing sugar
Garnish
sour cream or sweet condensed milk
icing sugar, if desired
Method
  • In a small cup, soak semolina in warm milk for 5 minutes. Add sour cream and mix well.
  • In a other small cup, soak raisins in hot black tea or water for 5 minutes. Drain and set aside.
  • In a bowl, beat eggs with sugar and salt until pale and creamy, allow sugar to dissolve.
  • In a large bowl, smooth cottage cheese with a folk or electric blender, add butter and mix. Add beaten eggs and vanilla, mix to combine. Add semolina and raisins, and combine.
  • Grease the baking dish with some butter or oil, pour the mixture in and bake in preheated 200C oven for 25 minutes. At this step check the color of your bake: if its top is still pale, brush the bake with glaze and put the dish back into the oven for 15 minutes or until golden-brown; if top is already golden-brown, omit the glaze and bake for 10-15 minutes more.
  • Cut the cottage cheese bake into slices. Serve warm or cold with a dollop of sour cream, if desired. It’s also tasty to pour over some sweet condensed milk (instead of sour cream).
Enjoy!

Trout fritters with green peas

 Last weekend I bought a beautiful rainbow trout. It’s a very delicious fish, that rich in omega-3 fatty acids, and its’ also an excellent source of vitamins and protein. One its part gone to be cured (you may find the recipe here), another was roasted and I still had some more. I decided to make a pie from the book “pies and tarts” by S.Reaynaud. The recipe is very simple, it’s called for the trout, puff pastry, peas and horseradish, I’d had all that stuff. I’d made the filling and was disappointed because its quantity was more then enough, despite that I used more puff pastry then was needed. Fortunately, the overall result was fine, and the pie tasted pretty good. Have you tried to cook any pies from that book?

Thus I had to fix the remaining trout.. And here is the easiest and quickest recipe of delicious fritters. I used fresh trout, but you can substitute it with salmon, fresh or canned. I ate these little fritters for breakfast, they were good and satisfying!

Trout fritters
After plating I topped it with with sour cream and some horseradish sauce, also I recommend finishing it with a slice of cured trout or salmon. It was truly divine!Trout tritters with green peas and horseradish

Trout fritters with green peas

  • Servings: 2-3
  • Difficulty: easy
  • Print
Ingredients
100-150g fresh trout, chopped
2 large potatoes, peeled and grated
50-60g green peas, fresh or frozen
1 Tbsp finely chopped onion, optional
1 egg white (or whole egg)
1-2 tsp horseradish sauce
3-4 Tbsp thin cream
4 Tbsp or more plain flour

sea salt, white pepper, to taste

Garnish: sour cream, horseradish sauce, lemon wedges, cured trout/salmon slices
Method
  • Preheat oven to 200C. Line the baking tray with parchment.
  • Squeeze out the liquid from potatoes. Add it to a mixing bowl along with trout, peas and onion. Add horseradish, egg white, cream and combine.
  • Add flour, salt and pepper, and mix well.
  • Scoop out the dough to make 10-12 fritters. Gently press them down with hand.
  • Bake for 20-25 minutes or until golden-brown.
  • Serve with sauce you like and cured trout slices.
Enjoy the meal!
 Trout fritters with peas and horseradish

Mrs Pumpkin’s Rolls

Mrs Pumpkin and Mr Squash are in trend this autumn! 🙂 It seems everybody is obsessed with them and cooks lots of dishes. Bright, sweet-smelling and delicious, that is hard to resist and don’t to eat it; moreover pumpkin is a great course of vitamins A, C, B, K, E!
Pumpkin always pairs good with such warming spices like nutmeg, cinnamon, and vanilla. And it’s amazing how all the cozy autumn spices make cool weather quite easy to enjoy, and bring a sense of comfort on cold days.
Today recipe is for all Mrs Pumpkin’s admires! 😀
These rolls are perfect for weekend breakfast, or simply enjoy it anytime! Cinnamon-scented pumpkin filling, cheese glaze and hazelnuts make rolls crazy delicious!
Pumpkin Rolls with brown sugar and cinnamon
Actually, it was an experiment. I had to use cottage cheese leftovers, and firstly I planned to make cookies; but it seemed bored, besides that I’d made shortbread cookies a day before, thus idea of pumpkin rolls was born!
As you may see, I’m so pleased with the result of my experiment! Perfectly spiced and tender rolls! They can be served with lightly sweeten mascarpone or yogurt instead of cheese glaze. And one more important thing – the dough has no yeast, so the rolls can be easily made in the morning or when you’re short on time and don’t have time to wait for the dough to rise. 🙂Pumpkin Rolls

Mrs Pumpkin's Rolls

  • Servings: 8-10
  • Difficulty: moderate
  • Print
IngredientsPumpkin Rolls with honey cheese glaze
The dough
1 egg, at room temperature
40g brown sugar
120-150g cottage cheese
80g plain flour
110g wholewheat flour*
1/2 tsp/2.5g baking powder
a pinch of salt
1/3 tsp cinnamon
1 tsp vanilla extract

20g butter, melted
Pumpkin filling
300g pumpkin
1 medium apple
1 Tbsp lemon juice
1 Tbsp butter
1 Tbsp olive oil
1/2 tsp cinnamon
1/4 tsp nutmeg, freshly grated
30g mix of dark muscovado and brown sugar/ or only brown sugar (adjust sugar to taste)
20g butter, melted, for brushing the dough
Honey cream cheese glaze
70g Philadelphia cream cheese, at room temperature
1/2 Tbsp liquid honey
2-4 Tbsp full fat milk
icing sugar, if needed
hazelnuts, roasted and roughly chopped
Method
  1. For the dough, beat egg with sugar until pale and sugar is dissolved about 4-5 minutes. Add cottage cheese and fold in. Add flours, baking powder, salt, cinnamon, vanilla and mix in. Stir in butter and mix to combine. The dough should be soft but not sticky. *Add more flour if the dough is too sticky. Cover and keep to rest.
  2. Meanwhile, prepare pumpkin filling. Core and cut in small cubes pumpkin and apple. Heat butter and olive oil in a frying pan, add pumpkin and apple cubes, drizzle with lemon juice; saute on a medium heat for 8-10 minutes or until pumpkin is soft. Add cinnamon and nutmeg, mix and set a side to cool. Blend to get a puree.
  3. Roll the dough out to 37×26 cm rectangle. Brush the dough with melted butter, then sprinkle with brown sugar. Spread evenly the pumpkin mixture on the dough. Cut the dough into 8-10 equal strips, and carefully roll each strip into a ‘barrel’.
  4. Transfer rolls to the baking tray, lined with baking paper and greased. Bake in preheated 180C oven for 25-30 minutes or until golden-brown.
  5. For the glaze, beat the cream cheese until smooth, then add honey and milk and beat again. If you want to make the glaze more liquid add more milk and mix. Add icing sugar, if it’s not sweet enough.
  6. Arrange pumpkin rolls on a serving plate, pour the glaze over the warm rolls, and sprinkle with hazelnuts.
  7. Enjoy warm!
Rolls can be stored in an airtight container in the fridge up to 3 days (without glaze). Reheat before serving.

Pumpkin rolls not only look amazing, they taste great! 😉

Pumpkin Rolls with honey cheese glaze


1 3 4 5 7