Baking

Apple Scones

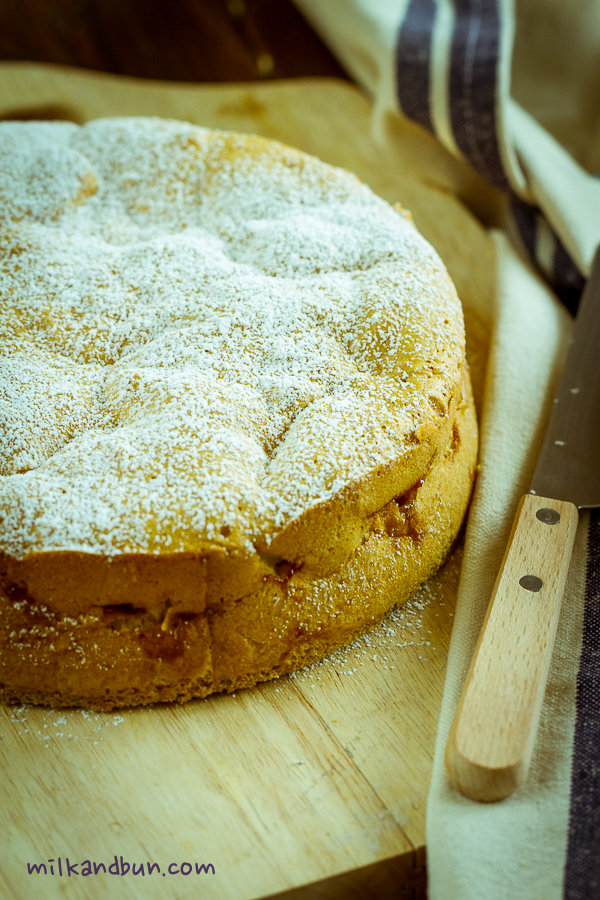
 Many of you heard about these lovely biscuits, which are called scones. Whenever I see or hear ‘scones’ I immediately imagine the Queen of the United Kingdom, how she’s drinking her 5 o’clock tea, beautiful china teacups are set on a huge royal table, and elegant waitresses serving various treats and of course scones! Did you know that originally scone was round and flat, usually as a medium-sized plate, it was made with oats and baked on a griddle, and only after that cut into triangular sections for serving. Only when baking powder became available and popular, scones began to be the oven-baked. Nowadays, scones are widely liked and popular not only in Britain. Saying honestly, scones aren’t popular in Russia, may be because of large and good variety of cookies and other cakes. Here, in the UAE the same thing, they are not sold in regular bakeries and stores, so I decided to make scones myself and here the result – buttery and tasty triangle scones. 🙂
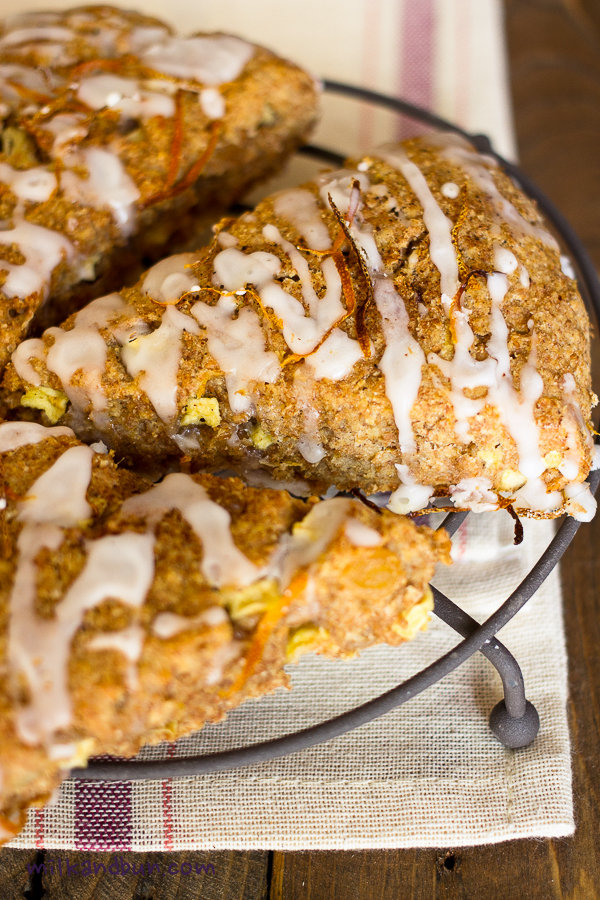
Triangle apple scones

Apple Scones

  • Servings: 6-8
  • Difficulty: easy
  • Print
Ingredients
150g plain flour
100-120g wholemeal flour
1/2 tsp salt
1.5 tsp baking powder
1 tsp orange or lemon zest
2 tsp cinnamon
100g sugar
110g butter, very cold
110g sour cream
1 egg
1 apple
1 tsp lemon juice
Glazing
100g powdered sugar
1-2 tbsp lemon juice
  • In a large bowl or food processor, combine flours, salt, baking powder, sugar, zest, cinnamon. Grate the butter or cut into small cubes, add to the flour mixture and mix in. Knead the dough.
  • In a small bowl, add sour cream, egg and whisk to combine until smooth. Pour the mixture over dry and fold until just combined.
  • Peel, core and cut apple into small cubes, sprinkle with lemon juice. Fold apple cubes into dough until just combined.
  • Put the dough on a lightly floured surface, shape into 20-23cm and 2cm thick disk. With a knife slice the disk into 6-8 wedges.
  • Transfer wedges on a lined baking sheet with some space apart. Bake in preheated 180C oven for 15 minutes. Allow scones to cool on a baking sheet for 5 minutes.
  • Meanwhile, prepare the glazing. In a small bowl, sift icing sugar and whisk with lemon juice until smooth. Drizzle scones with the glazing.
Enjoy tea-time!

Sharlotka

 Sharlotka – that’s how one of the popular apple cake in Russia called. I believe this cake is so widely-known that there is no a man in Russian who wouldn’t heard about it. When I was a little girl I ate sharlotka so many times that I hardly can count, I ate it at my home, at friends’ home.. And I still love it! It’s one of the easiest recipe that always turns out great!
There are many varieties of Charlotte dessert. Russian ‘charlotte’ was created by French chef Marie-Antoine Careme who worked for Russian Tsar Alexander I in 19th century in London. Believed that the dessert took its name from Queen Charlotte, wife of George III of the Intied Kingdom, who loved apples. For this dessert the bottom of baking mold was lined with sponge cake or savoiardi biscuits, then filled with Bavarian and whipped cream, and completely cooled. Originally the dessert was named ‘charlotte a la parisienne’ but lately became popular under the name ‘charlotte russe’ or simply ‘Sharlotka’.
In Soviet times the recipe was modified and became sponge cake with apples. Nowadays, the cake continues to be liked and cooked by many Russian women, including me. 🙂 It’s also a kind of ‘rescue’ sweets that you can prepare in minutes when your friends came around unexpectedly. Below recipe is my mother’s recipe, I haven’t change a word in it and the cake turns out perfect every time, I think it will make my mummy proud and happy. ❤Sharlotka

Sharlotka

  • Servings: 6
  • Difficulty: easy
  • Print

You can also roughly chop apples, stir into the batter and then bake.
I used 20cm/8inch cake spring-form.
Ingredients
2-3 large apples, peeled, cored and sliced
3 eggs, at room temperature (better to use large eggs)
80g white sugar
110g plain flour
2 tbsp water
1/2 tsp b.soda
1 tsp lemon juice or vinegar
a pinch of salt
icing sugar for dusting, optional
Preparation method
  1. In a large mixing bowl, add 3 egg yolks, water and sugar. Put baking soda in a tablespoon, pour in lemon juice or vinegar, mix with a teaspoon to dissolve it, then pour into the egg mixture. Beat egg mixture until light and creamy.
  2. In another bowl, beat egg whites with a pinch of salt until soft but steady peaks.
  3. Gradually mix egg whites into egg yolk mixture. Don’t stir too much.
  4. Gradually sift and fold in the flour.
  5. Grease and dust with flour the baking form. Gently spread half of the batter into the form. Arrange apple slices. Pour in the rest batter, evenly spread.
  6. Bake in preheated 180C oven for 30 minutes.
  7. Sprinkle with icing sugar, if desired. Serve warm with a cup of freshly-brewed tea.
You can keep the cake in a box or on a plate covered with foil in the fridge up to 3 days.
Enjoy!

Sharlotka- Russian apple cake

Sharing this tasty cake with Fiesta Friday and all lovely bloggers who is enjoying it!

Plum cake

It’s a fact that spring came to this year-round sunny city too, and temperature start to creep slowly. During the day the weather is still nice for swimming and sunbathing without uncomfortable sweating like in the summer months. Another pleasure is to take an evening walk in the fresh air, or to sit outsite and enjoy sipping a tea while the weather is till cool. Having a tea without a piece of cake is absolutely wrong thing! 😀 So, you can guess that one of my favourite ‘indoor activities’ is baking! I had mascarpone cheese and ripe plums that used to be a jam, but mascarpone was nearly to expiry date and I had to use it somehow.. Plum cake ingredientsIt was a ‘mix all what you have’ cake, I also added a splash of cognac for an extra hit. After a half an hour of baking the cake was still uncooked and I was a bit worried. But the final result was a wonderfully divine and delicious cake! It was totally worth the wait: tender, moist and filled with amazing flavour! I will be making this cake again! 🙂Plum cake (with mascarpone and cognac)

Plum cake with mascarpone and cognac

  • Servings: 6
  • Difficulty: easy
  • Print
Ingredients for 18cm baking tin
50g butter, very soft
80g brown sugar
2 eggs, at room temperature
1 tbsp cognac (or brandy)
1 tsp vanilla extract
2-3 tbsp lemon zest, optional
100-120g mascarpone, at room temperature
100-110 g plain flour
1 tsp baking powder
4-5 dark plums, sliced
1 tbsp plum jam (or apricot jam), optional
Preparation
  • In a mixing bowl, beat the butter with sugar. In a separate bowl, beat eggs with cognac, vanilla and lemon zest. Gradually stir into the butter mixture. Fold in mascarpone cheese. Sift flour with baking powder into the batter, mix to combine.
  • Pour the batter into greased baking tin. Arrange plum slices on top. Bake in preheated 180C oven for 50-60 minutes or until the inserted toothpick comes out clean. Grease the top with jam. Let it cool slightly before serving.
Enjoy!
Tender and Tasty Plum cake

Russian Easter. Kulich

 Today is Paskha (Easter) in Russia, it’s a bright and warm festival that is celebrated among Orthodox Christians. Traditional and famous treats for this day are the colored eggs, kulichi, and paskha (in my next post). During this day we congratulate each other and say ‘Христос Воскресе’ which means Christ is risen, and the reply is ‘Воистину Воскресе’ – indeed hi is risen.Easter cake-Kulich
 Kulich is a special Easter sweet cake/bread which usually has a cylindrical shape and decorated with white icing. It’s made from rich yeast dough; raisins, currants or candied fruits can be added. Traditionally kulichi have a cylindrical shape, and some Russian housewives use empty tins from pea or beans for that purpose. After baking and cooling kulichi is glazed with white icing (egg white or water with sugar) and decorated with edible sugar beads, flowers, and thin candles. Kulichi and died eggs can be also blessed in church; a part of Easter treats usually is leaved in church for poor people.Kulich- Russian Easter cake

Kulich recipe {Russian Easter cake}

  • Servings: 2 pieces
  • Difficulty: moderate
  • Print
I used large eggs. Egg for the glazing needs to be very fresh.
The dough should be soft, but if needed add more flour.
 

Ingredients

350g plain flour

5-6g yeast
small pinch of salt
130ml milk, warm
1 egg
1 egg yolk
80g white sugar (or 90-100g to make it sweeter)
1 tsp vanilla extract or vanilla sugar
50g butter, very soft but not melted
60g raisins (golden)
60g currants (dark)
Icing
1 egg white
150-160g icing sugar
1 tsp lemon juice
Sprinkles for decorating
Preparation method
  1. In a large mixing bowl, sift 100g of flour, add salt, yeast, warm milk and stir to combine. Cover with a wet kitchen towel and let it rise for 30 minutes.
  2. Meanwhile, in a small bowl, whisk a whole egg, egg yolk, vanilla and sugar with a hand or electric mixer for 2-3 minutes until pale. Add egg mixture and butter to the dough, mix to combine. Sift the remaining flour and knead to combine. Cover again with a wet kitchen towel and let it rise for 30-40 minutes.
  3. Wash raisins and currants, blot it up with a paper towel, sprinkle with a teaspoon of flour – you need to cover all raisins with some flour, it allows them to be evenly distributed throughout the dough. Add raisins and currants to the dough, mix into the dough. Cover with a wet kitchen towel and let it rise for 60 minutes.
  4. Line baking pans with baking paper, grease with butter. Divide the dough between two baking pans, the dough should occupy 1/3-1/2 of the volume (because it will rise very high during baking) of the volume. Cover and let it rise for 20-30 minutes.
  5. Bake in preheated 100C oven for 10 minutes, then in 180C for 30 minutes or until the toothpick inserted into it gets back dry. If the top becomes too golden – cover kulichi with a piece of foil or baking pepper.
  6. Take out of the oven, let it completely cool.
  7. For the icing, whisk the egg white with few tablespoons of sugar and lemon juice until well combined. Or beat it with an electric mixer on a low speed. Gradually add more sugar and whisk again. Keep adding sugar until you get the desired consistency (not too liquid).
  8. Spread the icing on top of each kulich with a tablespoon. Add sprinkles. Let it dry.

Enjoy!

Cover kulichi in the foil and keep in the fridge for up to 3-4 days.

Russian Easter sweet cake -kulich

Pirogki with spring onions and eggs

 Pirogki means small pies in Russian. Most of the time yeast dough is used for these delicious pirogki, like I made for Kulebyaka pie. But making such dough is a time-consuming, and you need to make lots of small pies or one big. I suggest you to try the dough based on kefir or any other soured milk product, it’s very quickly to prepare, and you can use both sweet and savory filling. Today I chose one of favourite filling in my family – a mixture of chopped spring onions and hard-boiled eggs. Pirogki with this filling reminds me warm days in Russia, first of the spring crops, including young and juicy spring onions from parents’ garden and amazing aroma of these pies. For my husband, it brings memories about his grandmother, the days she was cooking these pies and serving with a jug of fresh milk. 🙂Pirogki with spring onion and eggs

Pirogki with spring onions and eggs

  • Servings: 3-4
  • Difficulty: easy
  • Print
*Using sour cream is optional, you can substitute it with the same amount of kefir or creme fresh. 
These pirogki is also good with a soup instead of bread.
Ingredients
220-250ml full fat kefir (buttermilk or laban)
1/2 tsp baking soda
1/2 tsp salt
1 tsp white sugar
2 tbsp sour cream*, optional
1 large egg
2 tbsp sunflower oil
400-450g plain flour
Filling
150g spring onions, chopped
1 tbsp butter
4 large eggs, hard-boiled, chopped
S&P to taste
Egg wash
1 large egg yolk
1 tbsp milk
Preparation method
  1. In a large mixing bowl, add kefir, soda, salt, sugar and mix. Leave for 4-5 minutes. Add sour cream (if using), egg, sunflower oil and mix well. Sift the flour into mixture, stir to combine. Cover with plastic wrap or kitchen towel and leave to rest for 20-30 minutes. If you don’t have time – rest it for 10 minutes or for a time while you’re preparing the filling.
  2. For the filling, in a small frying pan melt the butter, add chopped onions and saute on a medium heat for 5-7 minutes until soft. Don’t let it burn. In a bowl combine soft spring onions with eggs, season to taste.
  3. Roll the dough into 10-12cm circles, add 2-3 tsp of the filling into each circle, seal the edges.
  4. Arrange pirogki on a lined baking tray. Brush each pie with egg wash {for egg wash whisk ingredients together}. Bake in preheated 180C oven for 20-22 minutes or until golden.
  5. Serve warm with a glass of milk.
Enjoy! ❤
PiesEggsOnion
Russian pirogki - small pies
Sharing at Fiesta Friday party, wonderful party where Angie is a lovely hostess, and Margy and Selma are co-hosts this time.
1 6 7 8 10